≡ Menu

Make-Your-Own Sweetened Condensed Milk

Christmas treats often seem to call for sweetened condensed milk, and it can be a pricey item. Here’s how you can make your own in 3 minutes that costs next to nothing!

Sweetened Condensed Milk
1 cup instant (or 1/2 cup non-instant) powdered dry milk
2/3 cup sugar
3 T. butter
1/2 cup boiling water

Mix sugar and dry milk together in your blender. Add the butter and the boiling water. Blend until smooth.

This recipe yields the same amount as the standard 13 fluid oz. can you find in the grocery store.

{ 0 comments }

To Fit In: An Interesting Conversation with Louisa


I had an interesting conversation with my daughter Louisa (12) on our way home from our Friday Fun Classes (our homeschool activity). She and another homeschooled girl had been talking about if other kids would like them more, and if they’d be better accepted at church and fit in more . . . if they just went to public school. Afterwards Louisa began to talk to me as we drove along: “I know how to fit in, but I can’t fit in, Mom, because it would hurt.”

“You’d feel pain?” I questioned her, feeling somewhat surprised. I thought it would be a relief to her to know how to feel more at ease with her peers.

“If I say a bad word, it hurts. It hurts me all day. I feel so bad. It just isn’t worth it”, Louisa confessed.

That set me to thinking. We try to raise our kids to be good, to have high standards, to please the Lord in all that they say and do. We put a huge amount of effort into that training. And yet, faced with “to fit or not to fit”, Louisa was telling me that her childhood training—all my years of teaching her how to be upright—made it impossible to say the words that would make her “fit” more easily in a public school setting. If she wanted to “fit in”, she would have to deny the person I had taught her to be.

Louisa takes just one class at school every other day, at my insistance. She loves homeschool and we have a great time learning together, but since she is my last child, I wrestle with the notion that she needs to get out of the house and go to school a little bit. Louisa has described to me her “take” on what makes for popularity in junior high school. She thinks she knows how to be “in”, but it wouldn’t be a very comfy fit for her, she feels. As she sees it, the requirements include dressing trendy and fashionably, being disinterested in learning, being immodest, and acting catty and “butt-sy” (pushy), acting disrespectful of teachers, showing a big interest in boys and sex and doing a lot of outrageous and unlady-like flirting, saying you hate school, texting your friends all through class without letting the teacher see, talking critically of parents, breaking rules whenever possible, treating your siblings like enemies, not being too smart, and being so saturated in the popular music and PG-13 movies of the current teen culture that you can easily recite movie lines. This is how she feels she would have to act to be well accepted and popular in our current world, outside of her circle of homeschooled friends.

It is so eye-opening to listen to our kids. We learn so much, don’t we? I can see through her eyes how it must feel. Whether it is accurate or not, it is her reality. We teach our kids to have high standards and be good Christians, and yet the culture in general (including other adults, neighbors, maybe even Sunday school teachers, and sometimes even ourselves) may give our teens a conflicting message: “Be a good Christian, keep high standards, but do fit in with your peers, with the world, and be popular”. Sometimes that is asking too much. Sometimes it would hurt too much.

I’m still thinking about what Louisa said.

{ 0 comments }

What You Can Do Without (at the grocery store)

I think the recession is squeezing everyone. If not literally, then emotionally. People are not spending so much money; they are nervous with the economy. Me too. Here is what I cut out of my grocery list:

1st week: breakfast cereal
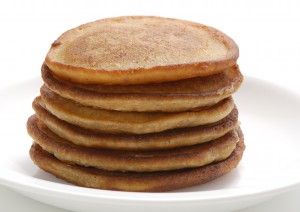
The breakfast cereal got cut, to my kids’ dismay. I would rather feed them oatmeal or homemade whole wheat pancakes for breakfast, but there are mornings when a quick bowl of cereal is what my college-going daughter Emily would love to grab. But, because there is no cereal, she is eating homemade pancakes, oatmeal or homemade bread instead. When you consider that a big box of cereal (16 oz.) usually costs anywhere from $2.50 to $3.97, that is a pricey purchase. At up to $4 a pound, you could spend your money much more wisely.

Next:  bye-bye to store-bought bread
I have a favorite type of whole grain homemade-looking bread that I buy every week at the grocery store. As I was loading up my shopping cart with 5 loaves of it, at $3.50 (to $5 per loaf, depending on if it had seeds in it or not), I stopped and did some math. I could spend $25 just for bread each week! I came home without bread and thought of every way I could skip on sliced bread until I got around to baking some. We had pancakes, muffins, scones, breadsticks, biscuits, and coffee cake—and it was great! It doesn’t take that long to mix up pancakes, and they are cheap if you make them from your own freshly ground flour. I started baking bread again, and my recipe makes 5 loaves—a week’s worth—for not much effort. (I have a Wonder Mill wheat grinder and a bread mixer that I absolutely love.) The bread is so delicious too! And I am using my stored wheat—that feels good too.

Now I am cutting out salad dressing
I read that by the time you use the salad dressing sitting on the shelf in the grocery store, the oil has already gone rancid, but is masked by spices and flavorings. I hope that is not the case, but even so, you will be surprised at how much fresher and more delicious homemade salad dressing tastes. And it actually does take only about 5 minutes to mix up a big batch of it that will last all month in your fridge, where the oil will stay fresh and healthy. Just a quick blend of olive oil, good vinegar and salt and pepper tastes great on salad. That’s how they do it in France, so you’ll be gourmet!  Try these tasty recipes!

We have become accustomed to convenience, but it’s pretty amazing how much we can trim if we need to.  Give it a try!

{ 0 comments }

3 Turkeys

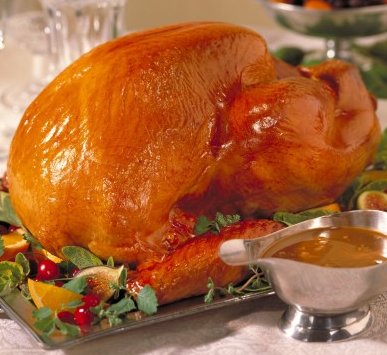
My goal this week is to buy 3 turkeys!

I will pull the big bag of brown rice and bags of bulk nuts out of my freezer and pack them into white buckets and store them in my garage (since weather is getting cold enough outside to keep them good). Now there is room for the turkeys in my chest freezer.

Why does anyone want 3 turkeys? Here’s my reasons:

1) turkey is incredibly cheap right now.

You can even find it “free” at some stores (with the purchase of this or that, or with a coupon). I just bought turkey #1 at 38¢ per pound. You won’t find meat that cheap anywhere all year! I got turkey #2 by saving coupons from a local grocery store and then buying a turkey breast for $7.50, the amount of my coupons: net cost, zero! I am still going out to buy turkey #3. That should be enough poultry to get us through the winter.

2) turkey is really a healthy food, high in nutrients.
It is an excellent source of quality protein, and low in fat. It is even leaner than chicken. If you did nothing more in your diet than replace beef in your recipes with turkey, you’d lose 5 lbs. a year. Turkey is an inexpensive source of iron, zinc, phosphorus, potassium and B vitamins.

3) turkey can be easily substituted for expensive chicken.
Many of us have fallen into the habit of buying the ultra-convenient frozen skinless, boneless chicken as a mainstay ingredient in our cooking. At anywhere from $1.99 to $3.99 per pound, chicken is pricey! We like the convenience of having meat that is easy-to-cook and doesn’t require deboning. By cooking a big turkey, then packing the meat away in freezer containers (or recycled cottage cheese or yogurt containers), you have the same convenience at a fraction of the expense. You also have ready-to-go lunch meat without all the salt, sugar and nitrites.

I buy the biggest turkeys I can find, as the meat-to-bone ratio gets better as the size of the turkey increases. It also makes the cooking job easier: you just have to cook and cleanup once to create lots of future meals. After taking the meat from the bones, I put the bones and any drippings from cooking into a big soup pot and simmer it all day to create very rich turkey broth for future soups, gravy or sauces.

Have a Happy Thanksgiving!

{ 0 comments }

Grandbabies . . . yum!

Love kids?

I have discovered a much easier way to get them than pregnancy, labor, childbirth and night feedings. It is called “grandbabies”! And here are mine: Rebekah (5), Abigail (3), Rachel (1) Isaac (7 months) and Christian (2 months). Aren’t they yummy!?

Isaac (7 months) and Christian (2 months) are almost the same size, since Christian got a running start—he was 12 lb. 9 oz. when he was born! Oh my gosh. Here’s my two little grandboys:

Christian may be the heavyweight, but Isaac definitely has the upper hand, and thinks it is funny too! Adorable, huh!? I’m so blessed that my kids give my grandkids good names!

Well, just thought I’d share one of the joys of my life tonight.

Love,
Diane

{ 0 comments }

No Regrets!


If I had my child to raise all over again,
I’d finger-paint more and point the finger less
I’d do less correcting and more connecting.
I’d take my eyes off my watch, and watch with my eyes.
I would care to know less and know to care more.
I’d take more hikes and fly more kites.
I’d stop playing serious, and seriously play.
I’d run through more fields and gaze at more stars.
I’d do more hugging and less tugging.
I would be firm less often, and affirm much more.
I’d build self esteem first, and the house later.
I’d teach less about the love of power,
And more about the power of love.
—Diane Loomans (Full Steam Ahead)

Isn’t it wonderful that homeschooling affords us these opportunities!?
I’m happy! I’ve done my share of finger painting and hugging . . . no regrets!

{ 0 comments }

First Snow!


The first snow makes my kids estatic, but I will miss the flowers, and the gorgeous gold and red leaves. I left some strangers out in the cold accidentally, and that first snow took us all by surprise! I always want to make our jack o’ lanterns into pumpkin bread, and these were patiently waiting, but the snow came first—their faces even look startled, don’t they?!


Poor apples got it too!

Just in case your pumpkins were more fortunate than mine, and you are still hanging onto them, try my favorite pumpkin recipe: Pumpkin Pike. We named it “Pike” because we were experimenting to create a recipe that my pumpkin-growing (but pumpkin-pie-not-liking) son could enjoy using his home-grown pumpkins. This combination of “pie” and “cake” did the trick. It is really a cake with lots of pumpkin in the recipe—very yummy!


Pumpkin Pike

1 cup honey
1/2 cup butter
4 eggs
1 plus 3/4 cups cooked pumpkin, well drained (or 1/2 of a large 29 oz. can of pumpkin)
2 cups whole wheat flour, freshly ground
2 teaspoons baking powder
1 teaspoon baking soda
1/2 cup walnut pieces
1 cup carob chips or chocolate chips

Cream butter and honey. Add eggs and pumpkin and mix well. Gently stir in flour, baking powder, soda, nuts and carob chips until just blended. Pour into a 9 x 13” glass baking dish. Bake at 350° for 30 minutes or until toothpick comes out clean. Serve warm.

{ 0 comments }

Knitting Bug


We’ve got the knitting bug at my house!

My support group, Homeschooling Friends, holds Friday Fun classes each week–a sort of cooperative school situation where we teach each other’s kids and enjoy being together for a few hours on Friday mornings. Well, one of the moms is teaching the kids to knit, and I sneaked a peek in her class, and then got hooked myself. I wasn’t quite sure how to hold my needles, or what to do, but with some effort, I learned to knit and I am having a great time with it. The learning curve is pretty steep at first, and it can be easy to get discouraged, but if you can get the kids (and yourself) to just stick with it awhile, suddenly you are knitting like a pro!

I taught the rest of my kids to knit now, and we are all enjoying cozy evenings with all our needle clicking as we visit and knit. This is really fun! Another plus, it gives moms a reason to sit down and rest for a few minutes during the day without feeling guilty–I am still being productive!


(My daughter Emily shows her finished product above)

So far, we are making cotton washcloths (for dishes, or bath). Using bamboo needles (rather than the aluminum ones I remember from when I was a kid) has really made knitting so much more enjoyable. The bamboo needles are not so slippery, nor so unyielding as the metal ones. I used size 8 and that seems to be a good size to learn on. Before we got each of my knitters a set of bamboo needles, we just used bamboo kitchen shish-kebab skewers, or chopsticks, sharpening the end of each “needle” a little in a pencil sharpener. You can even knit on a pencil if you want to. That works too!

I bought 100% cotton yarn (such as Sugar ‘n Cream brand) to make a washcloth. If you buy one ball, it will make 2 washcloths for just about $2 (on sale). Just cast on 36 stitches and knit every row, back and forth, until you have a nice square. It is really easy and fun. And the resulting washcloths are supreme! Wouldn’t that make a great gift with a bar of soap?

Here’s my finished products so far:


I can recommend a good and easy how-to knitting book, if you want to learn:

Knitting (Kids Can Do It)

Have fun!

{ 0 comments }

For Kids Who Love Space

Louisa wanted to study astronomy this year for science in homeschool. She is 12 years old and has her definite preferences, so I began a search for some resources to help. I have plenty of homeschool books on my shelves, as I have taught her 6 older siblings through the years, so I stacked them all up and looked through them one by one. Finally I found one with some obscure title that looked really good inside. The chapters are fun to read aloud together, and they have experiments at the end that we had a good time doing. The experiments didn’t use any odd ingredients, so I could really pull them together quickly—I love that! Part of the course is that the student develops a science notebook that contains their writing “narrations” of the things they have learned and also illustrations, vocabulary, etc. This is really working and is fun! Louisa is excited about the cool science notebook that she is involved making.

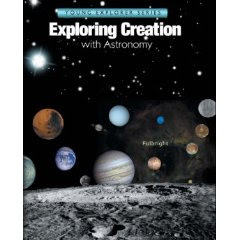
So, the big surprise was that while Louisa and I were sailing along, chapter after chapter, having a great time learning astronomy together in this unheard of book—it turns out that we are actually already selling this very same book in our bookstore. The copy I have has a different title as it dates from back before it became part of the popular Apologia Science series. But, it is really Apologia Exploring Creation with Astronomy!


One of the things I really love about Apologia science books is that I don’t have to always be running interference, and trying to explain our faith in a God who created the universe. That seems to be a dominant problem when using secular science resources. I am always faced with the Big Bang theory, the “trillions of years old” stuff, and trying to keep faith strong in the face of scientific “proof” that we are all evolved creatures living in an accidental universe. This book is fabulous for giving reasons to support faith in God while teaching science! One of the things we recently learned together was that Venus spins the opposite direction than the other planets in our solar system. The Big Bang theory says a big explosion set the planets all spinning, whirling out the same direction from a central “bang”. If this was so, Venus should also be rotating the same direction. I love learning facts that make Christians not feel so stupid scientifically!


My only regret is that I didn’t do ALL the Apologia science books for elementary grades. They are very specific to one field of science, such as Botany, Zoology, Astronomy, etc. which seems weird for young children. Most homeschool science books cover a little bit of each area of science. But, I like them even better that way as we can really delve into the subject! The Botany book is particularly good. These Apologia science books are meant to be used an a family unit study, for kids ages K-6th grade, which I really appreciate, as it is so much easier to teach all the kids the same topic, and do the experiments together.

Anyway, we are really enjoying using Apologia Astronomy, and wanted to it pass on. Louisa and I think it’s great!

{ 0 comments }

Apples!


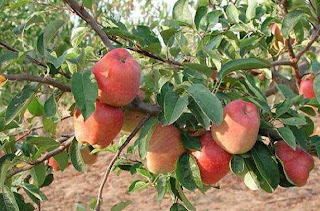
This year my trees are loaded with apples. It seems we are the only one in the area that got apples—some fluke of weather. We’ve given lots away, and with an uncertain economy, I am trying to preserve them as much as I can. I am not an ambitious canner, so I tried to think of ways I could do a little each day to put up these apples. They were not sprayed, so very few of them are perfect (and won’t store).

Here’s what I came up with, and it seems to be working great!

Too-Easy Applesauce
Wash apples and cut in fourths, removing the core. Do not peel. Fill a big cooking pot with apples and 1″ water. Put a lid on and simmer for 20-30 minutes or until apples are tender. Ladle into a blender and puree. Pour into recycled cottage cheese or yogurt containers, leaving 1″ space for expansion when freezing. Write “Applesauce ’08” on the lid, and freeze. This is really sweet and delicious on whole wheat pancakes, or stirred into plain yogurt!

Ready-to-Go Apple Slices
To prevent browning, pour 1/2 cup of pineapple juice, orange juice or lemon juice (diluted in water) into the bottom of a gallon sized ziplock bag. Wash apples and slice them thinly right into the bag, discarding the core. When the bag is full, ziplock shut and rotate back and forth to make sure the juice coats all the apple slices. Open bag and drain the juice into the next ziplock bag to use again. Close bag, inserting a straw in to suck out all the air before sealing completely. Freeze. These are great to use in apple desserts and makes the job a lot quicker!

{ 0 comments }