≡ Menu

Natural Speller versus Has-to-Be-Taught

Ammon, Julianna and Mark
Will the “natural speller” please stand up?

Having homeschooled 7 children, I eventually figured out that either kids come as “natural spellers” or they don’t. And if they don’t, you have to teach them to spell.

The natural speller can see the word in their head. You might see them writing it with their finger in the air when they are figuring out the spelling of a word. Spelling comes pretty easily to this child.

The “has-to-be-taught” speller is just as intelligent. In fact, spelling doesn’t have much to do with intelligence. As soon as the “has-to-be-taught” speller gets some memory clues or rules to go by, they can spell just as well as anyone. Of my 7 children, a few of them are natural spellers.

For the natural spellers, it is pretty much a waste of time to give them spelling lists, spelling tests, workbooks, or spelling activities. They will get it eventually, no matter what you inflict upon them. They can see the word in their mind’s eye and the more times they see it, read it or write it, the easier it gets. For a natural speller, I have found the best exercise is to correct their daily journal writing, and help them analyze a misspelled word. Once it is pointed out, they can practice that word—write it a few times each day perhaps. A memory clue is big help, such as pointing out the word end in the word friend (a friend is a friend to the end). Once they can see the right spelling, they generally do great at self-correction in the future.

Here are a few spelling clues to get you thinking:

here, hear
hear–you hear with your ear. See the word ear in hear.
here
and there are places. You can see here in there.

together
Separate the word into syllables: to-get-her
If you are going somewhere together, you have “to get her” first.

The main thing is to talk through the misspelled word with your child the first time you spot it. Just dissecting it is often enough to help a natural speller see and correct his mistake. When my son spelled rock as roc, I asked him to spell sock, clock, block, lock, etc. As he put the ck on the end of each word, he quickly recognized the pattern and fixed rock without another word from me.

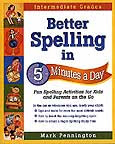
For my “have-to-be-taught” kids, my favorite resource is Better Spelling in 5 Minutes a Day. This was a wonderful discovery in my homeschool, because my kids love to do it. It isn’t the usual dry-bones spelling rules with drill, drill, drill. Each section of this non-tortuous book briefly teaches you (the mom/teacher) how to present the spelling rule to your child, often with a little rhyming ditty, and then the rest of the section has games to practice with: mazes, word games and puzzles that reinforce the spelling rule. There is
not even a spelling list! Or a test. Each lesson is a process of discovery in finding out which words follow the rule. It’s empowering! This book can be used from about age 9 and up, but even a teen will benefit and learn to spell better.

Good spelling is just about as important as brushed hair or a washed face. It is often the first impression we will make. In a day when email or texting is a common form of communication, spelling matters. Believe me, I have seen my share of misspelled job applications—and they are not very impressive. It’s worth it to teach our kids to spell!

{ 0 comments }

“Oh Yum!”


Feeding my guys when they come home from a Sunday meeting 

Making nice meals for my family is really rewarding to me! Dinner time is a gathering time—Daddy comes home from work, teenagers come home from their activities, those at home have been busy helping me cook, and as each chair is pulled up to the table, the room is noisy, happy and full of connection and togetherness. “Oh, yum!” . . . “this is my favorite, Mom!” . . . “thank you so much” . . . It is very satisfying to have a delicious hot meal ready for my family, especially when it is cold outside. It seems to be a way of administering to their relief, to comfort my family members and help fulfill their needs. And we have such a good time eating together.

I like healthy food. Nutrition (and keeping my children in glowing health) is one of my interests, so I am always trying to finagle a way to swap out sugar, white flour, white rice, and other vitamin-empty foods for whole grains, and honey or another natural sweetener. Sometimes I go way too far, like the time my chocolate chip cookies came out like biscuits. Nobody liked. But often, the results are satisfying and tasty, and I feel like I have had a victory, of sorts!

The other day, I made a batch of whole wheat bread dough. I baked 4 loaves, and then made scones for Navajo Tacos for dinner. But I still had dough left. What to do? I pulled it out thin onto an oiled cookie sheet and without a recipe—like an artist painting a picture—I topped it with crushed tomatoes, sprinkled on dried basil, Italian seasoning herbs, garlic powder, and then added sliced onions and sliced mushrooms. I baked it and took it out early because I thought I’d finish cooking it the next day so it would be hot for lunch. To my surprise, it was absolutely the best! The shorter cooking time made a soft tender crust that was delicious. I can’t imagine a tastier pizza had it been white dough for the crust. This was whole wheat at its yummiest. It tasted so good that we decided to eat it for breakfast the next morning, which we happily did!

Administering to our families in a loving way. Food. It goes together. Being a comforter. It is a good job, and I like it.

{ 0 comments }

Lip Gloss, Vanity and What Really Matters

THAT REALLY MATTERS

My mother says she doesn’t care
About the color of my hair
Or if my eyes are blue or brown
Or if my nose turns up or down.
She says she doesn’t care for things like that.
It really doesn’t matter.

My mother says she doesn’t care
If I’m dark or if I’m fair
Or if I’m thin or if I’m fat.
She says she doesn’t care for things like that.
It really doesn’t matter.

But if I cheat or tell a lie
Or do mean thing to make folks cry,
Or if I’m rude or impolite
And do not try to do what’s right,
Then that really does matter.

It isn’t looks that makes one great.
It’s character that seals your fate.
It’s what you are within your heart, you see,
That makes or mars your destiny.
And that really does matter.

{ 0 comments }

What’s It Like to Be a Boy?

My son Ammon is a sensitive, intelligent boy who loves plants. He is a careful 17-year-old, and he has been working studiously on his budget. I noticed that his budget includes a monthly allowance for “breaking things”. I was amused that he would list such an expenditure, but over the days since we talked about his budget, I have had a taste of what it would be like to be a teenage boy.

Not ripping your clothes is a constant challenge. Somehow barbed wire just jumps out at you when you walk by. Outreaching knobs and latches snag your clothes when you pass. Your pants end up with holes in them. Your buttons rip off when you wrestle.

Dishes slip out of your newly-large hands. Pictures on the wall just seem to slide off when you walk near them. Even ceiling moutned light fixtures are not safe from a boy’s antics. Keeping a watch on your arm while doing boy things is always tricky. That is, if you don’t lose it first.

Not breaking things is extra difficult. Yesterday alone included dropping a sharp object on the kitchen floor and denting it, and then dropping a stapler on the hardwood table and denting it. Perhaps it has to do with the need to do science experiments with every thing you handle. Last summer’s breakage expenses included a truck window. Ammon was loading firewood onto the back of someone’s truck as a service project, and accidentally jammed a log against the back of the cab window, shattering it. That was a pricey budget deduction. Last month, it was a broken bow to his violin. Whatever it is, breakage is a real and ongoing issue for boys!

My current theory is that teenage boys are kids in mens’ bodies, and still trying to learn to handle and direct all the sudden and unexpected muscle power. They mean well, but things do break ever so easily when you are a teenage boy!

Mom, don’t get too mad at your teenage or soon-to-be-teen boys. They really don’t mean to break a thing. They really mean to be very sensitive and very careful. It is just all this strength unleashed . . . it is hard to keep it in good control! It feels like driving a car for the first time. These boys will soon be men and off on important duties. Enjoy now!

{ 0 comments }

Broccoli Cheese Soup

My daughter Emily serves up some yummy hot soup!

Here’s a quick and delicious soup that can be made mostly from your pantry. The only thing fresh you need is broccoli and cheese.

Broccoli Cheese Soup
4 cup diced broccoli
1/2 tsp. basil
1/4 tsp thyme
1/4 tsp pepper
1/2 tsp salt
1/4 cup dried onions
4 cups chicken broth
scant 1/3 cup cornstarch
1 and 1/8 cup non-instant dry milk powder (or 2 cups instant dry milk)
3 cups grated cheddar cheese

Cook broccoli in 2 cups water with onions and spices until tender. Put 4 cups of broth, cornstarch and dry milk powder into a blender and blend until smooth. Add to broccoli and cook until thick. Stir in 2 cups cheese and transfer to serving bowl. Sprinkle the remaining cheese on top of the soup. Serves 6. Yummy, filling, easy!

Baked potato topping:
Don’t add the cheese to soup, but serve the soup as a thick gravy over a baked potato, topping with grated cheese.

Company dinner:
You can make this into a gourmet main dish by adding grilled chicken cubes and serving over brown rice.

Brown rice is delicious and very healthy. When I cook brown rice, I measure 2 cups of water (or broth) for every cup of rice. Then I shake some wild rice in, for a gourmet touch: 1/4 to 1/2 cup is just right. I also add a few tablespoons dried onions, dried diced carrots, and dried parsley. This makes the rice colorful and tasty. 1 cup of brown rice plus 2 cups liquid and about 40 minutes cooking time will give you 3 cups of moist brown rice. Don’t take the lid off. Just cook over medium heat until the rice absorbs the water and is tender. Ummm, perfect!

Enjoy!

{ 0 comments }

Feed the Birds

I hate to throw out my Christmas tree!

We always want the scent and thrill of having a real, fresh Christmas tree but it is still green and lovely when January rolls around and it seems such a shame to just discard the thing that gave us such joy a week earlier! What to do?

A few years ago, we started a tradition of putting our tree outside on our deck right up next to the glass door with a bird feeder hanging on it, or with balls of bird seed. We leave the lights only on, and leave it right in its stand. The lights look cheery out in the snow at night. And during the day, we watch the birds gather in the tree and it is so fun to see them hop from limb to limb. Sometimes there are 6 or more birds in the tree at the same time! They find shelter from the snow storm under its boughs and have a party feasting on bird seed when the weather is fine. It is very entertaining watching them from just a few feet away indoors while we are eating meals. That Christmas tree is still bringing us (and a bunch of birdies) lots of joy!

Bird Seed Balls
Cut a length of yarn, fold back on itself and put a big slip knot in the bottom. Mix 2 cups of bird seed with 1/2 cup of lard or shortening. Gathering it like a little snowball, form a ball around the knot of the yarn. Gently hang or rest the balls on the limbs of the tree. The cold weather outdoors will firm them up and make them less fragile. These are a feast for hungry birds that need the fat for winter survival!

{ 0 comments }

Kids, the Second Time Around

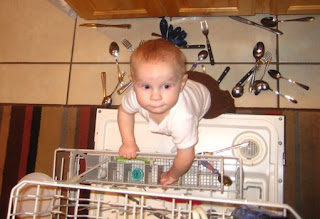
Isaac, my first grandson, has taken upon himself the task of unloading the clean silverware.
Now, to progress to putting it in the drawer . . .

My whole gang came home for Christmas! What a happy experience was it to have all my children under my roof again . . . and all pulled up to my table again. Sixteen plates set for meals is tons of fun! Wish it could always be this way:
Daniel and Melissa and their 3 little ones
Nathan and Melanie and their 2 babies
Mark, Julianna and Emily: my 3 very eligible young adults
Ammon and Louisa: still in home school
and their dad and I = 16!

I’m Grammy. I tried on lots of names for size when I was making my debut into grandmotherhood five years ago. I tried Grandma, Granny, Nana, Oma (Dutch for grandmother), and several other versions. I wanted my name to be unique, and not easily confused with my grandbabies’ other grandmas. I wanted it to sound warm and cuddly and like you could just climb right up on my lap and get rocked in the rocking chair. So I finally settled on the name Grammy, thinking I had invented a one-of-a-kind name. (I’ve since met many other Grammies!) I love hearing the little ones call me Grammy!

Being a Grammy
is pretty interesting business. It is a delicious taste of little ones—the second time around. And this time, raising kids looks very different! It seems that 33 years of mothering has changed my perspective and priorities drastically. The first time around, my child was 2 years old for a decade it seemed, whereas now, my grandchildren seem to be 2 years old for only 5 minutes.

And picking battles. That has changed enormously. The number of things I feel like fighting over and holding my ground over with kids has melted into 1) basic survival and 2) being a Christian. All else is not quite important enough. Now I want to hug tight and know that this moment is fleeting and we should cling together, rather than struggle against each other. And I see them as small and tender and in need of gentleness and comfort from the most important person in their life.

I got the very luscious privilege of rocking my grandbaby Rachel Lily (1 yr.) to sleep at night several times while she was here for the holidays. I remembered once again how little ones sometimes get overwhelmed by their own needs and can be helped to cope by just being cuddled, held tight and rocked hard for 10 minutes—and all the stress washes right out and they relax and their eyelids flutter and they go limp in peaceful slumber . . . a most gratifying experience in helping my beloved little person.

And I was reminded of how big the job of parenting is! Wow, it takes dedication and energy. Just watching my married kids take such attentive care of their children made me realize how raising a family right requires all our strength and effort. God gives us children when we are young for a very good reason! I stretched out my “youngness” and childbearing as long as nature would allow. By the time I birthed my long-awaited 7th child, Louisa (at 43 years old), I reluctantly admitted God’s wisdom in gracefully turning off our childbearing, although I never would stop wanting another child.

Parenting is a long journey with a very steep learning curve. It takes a while to learn to admit that you don’t have the answers, never did have them, and never will have them all! Every child is a new challenge and the old tricks don’t work on this one. Nothing makes you see your own inadequacies, squelches your pride and makes you fall to your knees for help as quickly as your own little child.

Something happens over the years. Something alters within you, as a woman. I remember holding my first baby (Daniel), just a few weeks old, while I watched my church friends play volleyball at a young marrieds activity. I sure wanted to play!! I ached to play. I got my husband to hold the baby so I could play for a little while. And thus started that indescribable pull that makes mommies fuss and worry about their babies and prefer holding them and being with them. As a young mom, I had so very much that I wanted to do: crafts and decorating our apartment, and cooking new recipes and sewing baby clothes and reading books and learning new things and taking a calligraphy class and being with my husband . . . and taking care of my baby didn’t allow me much time to do these things. I can remember feeling restless and frustrated at times. But God works on your mother-heart until you end up several decades later preferring holding the baby to doing any of those things. And realizing that nothing is as important as a baby.

I still think mothering is the best job. Mothering and grandmothering.

Aren’t we blessed?

{ 0 comments }

Merry Christmas!


I am trying to be a technological, up-with-the-times mommy, so come see my online photo Christmas card.

I hope your days are merry and bright!

Diane

{ 0 comments }

Secret Service Star


Christmas is a time when we try to do lots of service for those in need. What memories we have from all those good times. But, sometimes we can forget the truth that “charity begins at home”.

That’s why one of my favorite traditions of Christmas is our “Secret Service Star”. In the past, we’ve used a wooden star painted gold. When that got broken by my energetic young sons, a cardboard star covered in aluminum foil took its place. Doesn’t matter so much what the star looks like in our family anymore, it is the idea it represents. In fact, this year I just quickly drew a star on a post-it note! And it works just fine.

The important thing about the Service Star is that it initiates a very fun and good-feeling game of “you’re it!”. You can only hang on to the star for an hour if you get tagged. And how you get tagged is that the possessor of the star does a good deed for you, in secret, and leaves the star in its place.

I started off the game this year by doing my son Ammon’s chore: unloading the dishwasher. Then I left the empty dishwasher open with the post-it note star on the rack. Ammon noticed it, was surprised and delighted to have his chore done, and went quietly and secretly made Louisa’s bed, leaving the star on her pillow. Louisa was now “it” and got dressed to go out in the snow and help Emily to do a task she didn’t want to do. The star did its magic and again transferred to a new owner. And around and around it goes, making us all feel happier and more thoughtful of each other!

Eventually someone did a secret service for my grown son Mark when he came home to visit. Since he had to pass it on quickly and didn’t have much time, he brought a big cool glass of water to my husband at his desk . . . along with the Service Star! And he remarked quietly to me, “I need to be nicer.”

Around and around this star goes, making everyone a littler kinder, providing plenty of smiles and making Christmas come alive at our house.

“Christmas, my child, is love in action. Every time we love, every time we give, it’s Christmas.” -Dale Evans Rogers

{ 0 comments }

Diane’s Whole Wheat Bread


I received some requests for my bread recipes (after my blog about doing without stuff at the grocery store), so here it is for those who want to give it a try. My family has been raised on this delicious, healthy bread!

I make as much as I can at one time, but you can easily divide this recipe in half, or in fourths, for fewer loaves.

Diane’s Whole Wheat Bread
(makes 6 loaves)

8 cups hot water
1/2 cup fat (1 cube butter, olive oil, coconut oil, etc.)
1/2 cup honey
2 T. salt
2 T. instant yeast
23 (yep, twenty-three) cups freshly ground whole wheat flour (more or less)

Run tap water until it feels just hot to the touch (105 degrees). Pour water into the bowl of your bread mixer. Add fat and honey. Turn on the mixer and add 5 cups of flour while it is mixing. Add yeast. Continue to add flour until a dough has formed. Add salt.

You can substitute other sweeteners (molasses, sugar, fruit juice, etc.) if desired.  You can leave the sweetening out altogether.  French bread has neither sweetener or fat.  It goes hard quickly, but it still makes great bread!

As the machine mixes the dough, add more flour. The moisture content of your wheat, the weather, the temperature of your water, and many other variables will determine the exact amount of flour you will need, but it will be 23 cups of whole “white” wheat, give or take a cup or so. (If you use hard red whole wheat, the amount may be as little as 18 cups.) As you add the flour, watch for a certain consistency of dough to develop that will make the best bread. You can test it by pressing your thumb into the dough after it has been kneaded. You can check while kneading, and if the dough feels sticky, but will not adhere to your thumb, you have the right consistency. Knead the dough for 9 minutes by machine (or 15 minutes by hand). You’ll soon be a pro on knowing exactly how much flour to add, but here are pointers. If you add too much flour, the bread will be too dry and heavy, and the sides will have a horizontal crack in them. If you do not add enough flour, the dough will be sticky and will rise but when baked it will cave in a bit and droop over the sides of the pan, unable to hold its shape. The perfect dough will rise and hold its shape firmly.

At this point you can shape the loaves or cover the bowl and let the dough rise for awhile (25 minutes works fine, but less or more is fine too). I have forgotten it for hours (more than once) and come into the kitchen to discover the bread dough had risen up out of the bowl and fallen out onto the floor. Anyway, that bread tasted great too!

Divide dough into 6 equal parts. Shape into a loaf by pulling the top smooth and tucking the dough underneath until you have formed a loaf shape. As you form each loaf, you may press the top of the loaves in a plate of sesame seeds, poppy seeds, flaxseed, oatmeal, or breakfast cereal crumbs for added texture. Put loaf into well-oiled loaf pans and place in an unheated oven to rise for 25 minutes. You can test that the bread is risen sufficiently by poking your finger in the edge of the risen bread near the pan. If the poke stays indented for 3 minutes, it is ready to bake. I just trust the timer, as 25 minutes always works for rising time at room temperature inside a cool oven. After it is risen, just leave the pans in the oven, and turn the oven on to 350° and put your timer on 35 minutes. The loaves will be nicely browned and hollow-sounding when tapped. Remove from pans to cool. Makes 6 yummy big loaves!

You’ll find this recipe, and other good recipes for using whole grains, in my cookbook:  Hopkins Healthy Home Cooking.

Here’s some tips to make your bread-making more successful:
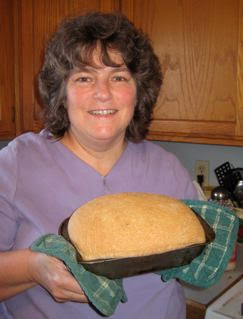
When baking whole wheat bread, use narrow loaf bread pans, rather than the wide loaf pans, because whole wheat bread is heavier and cannot sustain such a wide arch in the rising stage. My favorite bread pans are narrow, heavy gauge metal and quilted to enhance their non-stickability.

I use a wheat called “White Wheat” or Golden Montana wheat, which is a high protein wheat with a lighter color. This bread dough is light enough to make into cinnamon rolls or pizza crusts. If you use hard red wheat, it will make an excellent hearty loaf of bread, but is too dense for other uses, in my opinion, unless you mix it with some portion of regular white flour from the grocery store, which I never like to do. So, I buy “white wheat” kernels.

For a more tender loaf, replace some of the water with the water left over from cooking potatoes. You can even add a cup of potato flakes to the dough while you are mixing it (which means you’ll need a bit less flour).

Yeast is very temperature sensitive and can be killed if added to water that is too hot. Instant yeast should not be mixed in water. Using instant yeast, and adding it once a batter has been formed, has always been successful for me.  Yeast and honey are friends. Yeast and salt are enemies (yeast growth is retarded by salt: that’s why salt is such a good preservative as in beef jerky, pickles, etc.), so I add the yeast at the beginning of the process, after about 5 cups of flour is added. Then I add the salt at the end, after all the flour has been added, but the kneading is just starting.

You may add up to 2 cups leftover cereal (such as oatmeal, soggy corn flakes with the milk, etc.) to the dough with good results. Add it at the beginning with the water. If it is very wet, reduce the amount of water by 1/2 cup or so.

I know I am overly thrifty, but I save the crumbs from boxes of breakfast cereal, crackers, granola, nuts, and whatever else (rather than throw them out) and I throw them in the bread instead. Adds nutrition and variety, but most of all, it makes me feel very provident!

When shaping dough into loaves, or punching it down, just wet your hands by passing them under running water before handling the dough. It will prevent the dough from sticking to your hands.

You will need to mill your grain, and I’d like to pass on my hard-earned recommendation for the best grain mill on the market, the Wondermill. It is excellent for making quality flour from fine to coarse, and will even grind beans into flour (for instant refried beans) and popcorn into a bright yellow flour great for cornbread!

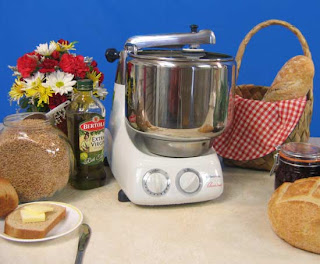
It really cuts down on hand labor to have a bread mixer. My favorite breadmixer is the Bread Mixer made by Electrolux (Swedish), which has been amazingly dependable. I’ve not had a repair ever on mine, and I’ve used it almost daily for 16 years now. I went through a bunch of mixers before making the investment, but it has been well worth it!

I spray my pans generously with olive oil cooking spray so that the loaves pop out easily.  You can grease them with coconut oil, butter, shortening, lard, or cooking oil if you prefer.

Rub a cube of butter over the top of the hot baked loaf just out of the oven if you want to make it shiny and tasty, and the crust soft. Or you can quickly pass the loaf of the bread (still in the pan and hot—straight from the oven) under a running stream of water. The water hitting the hot bread makes steam and will soften the crust. I like the crust crispy, so I don’t do either of these.

Rather than get out a cooling rack, I just tap the pan on its end hard enough to pop out the loaf of bread. Then I balance the loaf across the top of the pan, as a make-shift cooling rack.

Don’t get too exacting. People have been making bread for thousands of years without a recipe. It is hard to make it wrong. The only tricky parts are: 1) the yeast: making sure it is working and that you didn’t kill it with too hot of water, or slow it down with cold water. You can see if the bread is rising, so that should be reassuring that your yeast is working! 2) adding the right amount of flour so it is substantial but not overly heavy and dry, and 3) baking it at the right point, when the bread is risen enough to make a light loaf, but not over risen so it deflates in baking. You’ll get this all right with practice. If it helps to know, I made toe-stubbing doorstops for the entire first year of marriage.
Best success—you’ll be making good bread it no time!
 

{ 2 comments }