≡ Menu

Lessons from Playing Checkers

I hadn’t played checkers in at least 30 year when Louisa mentioned at the dinner table that her friends were surprised she didn’t know how to play checkers.  WHAT?!  I had failed in making my daughter culturally literate!  W-A-A-A-H!

Time to play checkers . . . immediately!

Thus began regular checkers games—whenever we’re in  the mood—that has stretched our brains, relieved stress, and given us something fun to do at the end of the day. And we’re actually getting good at it!

What I’ve learned from checkers:

  • take turns
  • going first is not always the best thing to do
  • watch your back
  • slow down and take a careful look before making decisions
  • things are not as they appear to be
  • patience
  • kings can do anything
  • watch out for those who have too much power
  • preventing someone from getting too much power is a lot easier than dealing with them once they have it
  • it’s not over until it’s over
  • risk taking gets you in trouble
  • keep hope—even the most dire situation can turn around

Now I understand why the general stores across the frontier in early America all had a checkerboard game on the cracker barrell next to the pot-bellied stove.  It’s good for us!

{ 0 comments }

Now Try Gourmet Pizza!

I’m on a jag, for sure.  This no-knead bread-making has me experimenting all over the place, to my family’s delight!

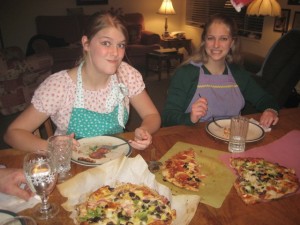
Now try pizza! It is gourmet tasting, cooks in about 7 minutes, and rivals any restaurant pizza I have ever tasted . . .  at a tiny fraction of the cost! And the big bonus is that it is 100% whole grain, fat-free dough that turns out crisp and bubbly!  YUM!

Here’s how:

#1 Cut off a piece of parchment paper the size of your pizza stone (or other cooking surface). Lay it on top of a rigid surface, like a cookie sheet without sides.

#2 Using my whole grain No Knead Artisan Bread recipe (after the initial 2 or more hour rising period), simply spread and stretch an orange-sized ball of dough onto a piece of baking paper, until it is about 1/2″ thick.  It will be sticky and adhere to the baking paper like glue.  Add water (or flour) to your hands so you can pull the dough thin.

#3 Preheat oven to 550 degrees (or 500 if that is as high as your oven will go).  Put your pizza stone or cast iron griddle or upside-down Dutch oven lid into the oven when you turn it on, along with a metal pan filled with 2 cups of water.  Set the timer to 20 minutes.

#4 Spread sauce on top of your stretched dough.  You may use grocery store pizza or spaghetti sauce.  Or use my recipe:

Gourmet Pizza Sauce

  • canned crushed tomatoes—about 1 (15 ounce) can per pizza
  • tomato paste—about 3 tablespoons per pizza
  • basil, chopped fresh or dried basil (about 1 teaspoon per pizza)
  • minced garlic or garlic powder (about 1/4 teaspoon per pizza)
  • Optional: a few spoonfuls of  “V-8 Powder” makes a richer, more nutritious sauce

Stir together ingredients, bringing to a simmer in a saucepan.  Simmer for 5 minutes.

Easy Method: If you’re in a hurry, like I usually am, just spread the crushed tomatoes directly onto the dough, sprinkle with basil and garlic (and V-8 Powder) and then spread it around with a spatula or spoon to incorporate the spices into the sauce. (I’ve omitted the tomato paste.)

#5 Add toppings:

  • cheese!  mozzarella, jack, pepper jack, cheddar, feta, etc.
  • artichoke hearts (my favorite!)
  • red or white onions
  • green onions
  • olives, black or kalamata olives
  • red, yellow or green bell pepper
  • pineapple
  • mushrooms
  • broccoli
  • zucchini
  • yellow squash
  • dried tomatoes
  • fresh tomatoes
  • roasted garlic
  • eggplant (slice very thin or pre-cook)
  • meat: pepperoni, sausage, hamburger, grilled chicken, BBQ chicken, ham, bacon, fish, shrimp, proscuitto, etc.
  • fresh spinach leaves (put these under the cheese or other ingredients so they don’t get burnt and crispy)
  • fresh basil leaves (treat same as spinach)

#6 Prep time takes about 15 minutes—putting the toppings on—more or less, depending on how many eager little hands are helping.  When the oven is preheated, it is time to slide the pizza plus parchment paper onto the really hot pizza stone (or other cooking surface).  Open the oven, quickly slide the pizza (and parchment paper) off the cookie sheet (or other rigid surface) onto the stone and shut the oven door.

#7 Check your pizza (through the oven window—don’t open the oven and let your steam escape!) I was stunned that the pizza was cooked to perfection in about 7-9 minutes!  That hot oven really speeds up cooking time.  I barely had time to set the table!

That’s it!  So easy!

{ 0 comments }

April Fools—Hee Hee!

Pretty daunting eating pancakes with tongs!

Havin’ fun at my house this April 1st!

First, there was a pancake breakfast served up on pan lids with tongs and carving knifes for utensils, plus unique drinking vessels.

Followed by some interesting little creatures in people’s beds.  Plastic spiders and lizards work great! Can’t wait to see their faces tonight when they crawl into bed!

A few tin cans or empty plastic containers tied with yarn to the back of the car make a lovely musical drive to work or college, for those family members driving cars today!

A “honk at me” sign is amusing me.  Just stick it on the back bumper of your unsuspecting victim.  They’ll have a attention-filled day!

I pulled the old fake eyeglasses/nose/mustache prop on my husband at lunch.  And hung the pictures in my daughter’s bedroom upside down.  It looked really nice in her room. . . if you were standing on your head.

Hey, have you heard about the amazing new technology from Google.  Really exciting!  I can’t believe the advances!  I was able to get through my email replies in half the time!

http://gmail.com/motion (for Gmail)
http://www.google.com/google-d-s/promos/motion.html (for Google Docs)

Well, enough fun for one day!

Uh, oh, my kids got me good:

Surprise—when you lift the toilet lid! Those naughty kids!

Guess they learned from an April Fool herself!

{ 0 comments }

A Child’s Self-Confidence: Handle with Care

Jennifer, a mom who reads my blog, wrote about what happened to her little boy:

My middle child went to kindergarten last year at what was supposed to the best public school in the best school district in Kansas, which is one of the top states in the country. He is a kinesthetic learner with incredible spatial skills, but is a slow learner when it comes to reading. Watching his classmates “get it” while he struggled, killed his self confidence. His teacher progressed through the curriculum according to plan, and my boy was left behind. Not only did he finish kindergarten not reading, but he did not believe himself to be capable of reading. His teacher NEVER raised with us any concerns about his reading—I’m not certain whether she even realized that he was struggling, because he is not the type to ask for help. Here we are now, homeschooling, half-way through 1st grade, and he is just now becoming confident enough in his reading ability to read to someone besides me. He still insists that he can’t read, but he’s reading cereal boxes, and he can answer for me when his little brother asks, “What does that say?”!  Yes, he is behind where other kids with his same manufacturing date range might be, but he is a unique little person who is learning and growing every day and I am proud of him and the progress he has made!

My heart sinks when I read comments like hers, because I have seen this happen too many times. And usually to boys, as they tend to be very hands-on and reading and writing comes later for them.  Just the thought of a kindergarten boy struggling to grip that pencil correctly and manipulate it to form legible letters is distressing—for some little boys, it is just so difficult!  And the girls their age often manage it easily, which only magnifies their deficit in their young heart. What pains me about Jennifer’s story is what happens to that little person’s feelings about himself—that wonderful self—and his feelings of capability.  Too sad!

I can remember when I was just a little girl, probably about 4th grade.  Our school pictures were coming up and I just wanted so much to have the “right smile”.  Back to that “norm” idea.  As if there is a “right” smile. I practiced in front of the mirror, trying to smile a movie star smile.  Is a 9-year-old girl even capable of a movie star smile?  No. “Too much television”, would be my diagnosis now, as a mother.  Too much of the world having an influence.  But I didn’t parent myself, so having that “right” smile was pretty crucial to me back then!  I practiced in front of the mirror, touching my face so I could memorize what it felt like to have that perfect smile.  When picture day came, and it was my turn to smile for the camera, I felt my face and made sure it was the “right” smile before the photographer snapped the picture.  Back in those days, you got one pose only—probably the same these days for school pictures.  When I got my pictures back, arrrrrrgh! They were AWFUL!  My pasted “right” smile was a facial contortion.  Plus, ALL my other classmates had a permanent record in their full sheet class picture!

The ache in this memory is the fact that a 9-year-old girl would even have the notion come into her head that she needed to try to be pretty, to have to try harder-than-possible to be acceptable.  I am sad that as a little child I had been trained early to worry about it!  It didn’t come from my mother, as she always had positive things to say about how beautiful we children were, and how we should be grateful that we even had a body that worked. So it must have come from the culture, the school environment, the early training out of ear shot of my mother.

One thing I have been surprised about in raising my homeschooled teenagers is that they never were afflicted with the self-depreciating attitude that children often display in the teen years (…my nose is too big, I’ll too tall, I’m too short, I’m too fat, I’m too busty, I’m not busty enough, I’m a wimp muscle-wise, I need to lift weights, etc.)

Actually I think it starts quite young, even back in kindergarten.  The teacher, wanting to make losing a tooth a fun and special experience for the children, inadvertently rewards those who lose a tooth by having them come up in front of the class, putting their name on the “Lost a Tooth” chart, taking their photo, giving them a special award, etc.  Seems like an innocent idea, but the seeds of peer comparison and self-depreciation are sown very early. I’ve heard more than one 5-year-old lament that they still had their baby teeth . . . as if it was a sin, or a reason to be sorry.

Children think they are fabulous—in the absence of negative peer review, and in the absence of being compared academically or skill-wise to classmates.  It is amazing to me to see the natural feelings of a growing child!  I used to worry a bit about it with when my first children came of age—to hear and watch them assess their bodies and make positive exclamations about how fabulous their bodies or their talents or their minds were!  It made me laugh nervously and feel embarrassed because in our culture it is not acceptable to mention how wonderful our body is!  And yet, viewing it from God’s perspective, it truly is amazing to see a child’s body transform into a teenage body, with all its resulting capacities.  Bigger muscles for boys means they can lift things and work like an adult and be truly useful to the family in that manner.  And it is natural for them to be excited and to make positive comments about what is happening to their body. “I’m so strong!  I lifted as many hay bales as Dad did!” Those type of remarks are often discouraged—we think they are un-Christian somehow, as if we are not being humble enough.  But truly, I think they spring from genuine awe and appreciation of the personal miracle that God has wrought in their lives.  And it follows that poise and confidence are the natural results of feeling secure and thinking well of oneself.

Self-depreciation is taught by our culture of critique as being appropriate.  Perhaps it sounds more humble, but it does a wicked work on self-esteem.  When children repeatedly compare and criticize their body, their intelligence, their capabilities—it does irreparable damage. Better to gently teach your children to contain their expressions of delight in public, than to nullify their appreciation for the beautiful work of God in their growing minds and bodies.

One of my young teenage daughters used to lay on her bed and hold up her adult-looking leg for review.  “Look how perfect my leg is!”, she would exclaim.  It made me chuckle, as I am a product of this culture of self-depreciation, and it seems odd to delight in oneself.  But when I truly looked at her leg objectively, I was amazed too!  How God transforms a child into a beautiful adult is amazing!

I can guarantee you that my daughter wouldn’t have that attitude towards herself if she’d spent much time in the culture of the public school.  I know that for a fact.  I had been hospitalized and was forced to put my youngest at age 9 into school for a few months during this time.  The drastic change in her attitude towards herself was alarming to me, and to her siblings.  In just 3 months, she transformed and it was not for the better. One trait she quickly developed was “social awareness ” (gotta be cool!)  Long before she attended school, she had been given a soft, furry, white, full-length coat that was her very favorite!  She felt like a snow princess when she wore it.  It was beautiful! She came home from school, coat slung over her arm, on a very frigid winter day.  “Why aren’t you wearing your coat?”, I asked. Because it made her have “polar bear hips” she confessed.  She didn’t even have hips yet! Whoever put that cutesy little barb of criticism into her mind prevented her from wearing her very favorite coat that made her feel beautiful . . . ever again. Though she never would part with it. I finally took it out of her closet recently and packed it away, and the feelings rushed back to me. So sad! So wrong!

Moms, academic training is important, yes.  But a child’s confidence and recognition of their own self-worth is crucial to their happiness and well-being their whole life long!  Children are able to hear the truth, that they are a beloved child of God and hear His approval spoken quietly to their minds, UNLESS the negative voice of their peers and the practices of our society’s critique system is louder. Which it usually is.

It is a good time in history to homeschool . . . to protect our children’s faith, tenderness, and self-worth.  God times the growth of their body and mind perfectly in His wisdom. He loves them. He speaks approving words to their heart about their wonder and worth. Why shouldn’t everyone else?

A child’s self-confidence requires gentle, tender nurturing.  Handle with care!


{ 0 comments }

Sweet Yeast Bread, the No Knead Way!

Sweet girl + sweet bread! My daughter Louisa bakes with me.

Have you tried making my Whole Grain Artisan Bread recipe yet?  It is so fun!  So fast!  And so healthy!

Come with me and  have a little fun experimenting with some sweetbread! This rich dough is called “Brioche” in France.  The recipe is basically the same dough as the artisan bread in my last blog, only enhanced with butter, sweetening and eggs creating a rich taste—a tender crumb inside, and a bronze, flaky crust outside.  I always wondered how they made those yummy frosted apple breads and other coffee-cake type breads that you can buy in the bakery.  This is it! Delicious!

Let’s go step-by-step:

How to Make Super Easy No-Knead Sweet Bread

#1 Get out a big plastic bowl with a lid, the kind you make potato salad in.  It can be a glass bowl with a pan lid, if need be, but not a metal bowl.

#2 Put into the bowl:

  • 7  1/2 cups whole wheat flour, hard white wheat freshly ground if possible.
  • 1  1/2 tablespoons instant yeast
  • 1 tablespoon salt
  • 8 lightly beaten eggs
  • 1/2 cup honey
  • 1 to 3 sticks of softened butter (1/2 cup to 1  1/2 cup) 1 stick worked fine for me. More fat = richer bread. Brioche traditionally uses 3 sticks.  (I’ve used coconut oil, also.)
  • 1  1/4 cup lukewarm water
  • optional: 1  1/2 tablespoons cinnamon
  • optional:  3 cups raisins or other dried fruit
  • optional:  2  1/4 cups cups chopped walnuts or pecans
  • egg wash (1 egg beaten with 1 T. water)

Stir to moisten ingredients and put the lid loosely on top of the bowl. Leave it on the counter for at least 2 hours. It will rise and then fall or flatten out.  After this initial rise,  you can form the dough into loaves, or put the loosely lidded bowl into the fridge and bake within 5 days.

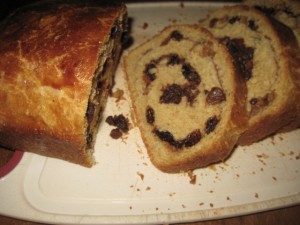
If you want a plain sweetbread, leave out the optional ingredients. To make my Cinnamon Raisin Walnut bread (picture below), add the cinnamon, nuts and raisins.  On the loaf below, I patted it out, and then made a layer of cinnamon, nuts and raisins, butter and sweeteners, and then rolled it up.  But I prefer it all mixed up in the dough—tastier, less work!

That’s it! No, you don’t knead it!

#3 To form loaves, just flour your hands and reach in to the bowl and scoop out 1/3 of the dough.  Quickly and gently shape it into a loaf—or just plop it down into a well-greased loaf pan—that actually works just as well, as the dough is quite wet.  Use narrow loaf pans which allow for better rising when using whole grain flour. Metal is my preference, since glass pans create a thicker crust, and you want this to be light. If any dried fruit protrudes out of the dough, poke it down in with your finger so to doesn’t bake to blackness from exposure.  Nuts get a tasty toasting if exposed but fruit burns.

#4 Let the dough rise for 40 minutes (one hour and 40 minutes for refrigerated dough). Brush egg wash on the top of the loaves. Bake for 35  minutes at 350 degrees in a preheated oven.  Makes 3 loaves.

That’s all there is to it!

Raisin Cinnamon Bread


Cinnamon Twists

To make the Cinnamon Twists that my daughter Louisa is eating in the picture above, make 1/2 the recipe of plain dough. After a two hour rise/fall period,  roll or pat dough to 1/2″ thickness on a lightly floured surface and brush with egg wash mixture.  Sprinkle heavily to coat with cinnamon and sugar (I used sugar-free sweeteners, a mixture of stevia and xylitol).

Carefully flip this upside down onto a greased cookie sheet or a piece of parchment paper and repeat with the egg wash and coating of cinnamon/sweetener.  Now you have cinnamon/sweet on both sides of the dough.  Use a pizza cutter to cut into 3/4″ wide strips.  Lift one end of the strip twisting it and laying it back down twisted.

Let rise for 15 minutes, and bake at 350 degrees for 15 minutes or until just baked through (not crusty).  Divine dipped into no sugar hot chocolate or milk!

Enjoy!

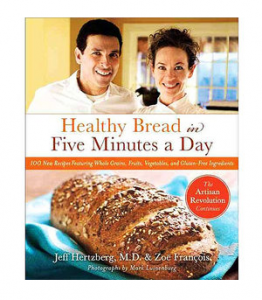
P.S. If you want more great recipes, Healthy Bread in Five Minutes a Day has lots of helpful tips and 100 wonderful recipes for every imaginable variation:  breads with raisins, cinnamon, dried fruit, veggies, herbs, whole grains, pizzas, ethnic breads, gluten-free breads, whole wheat hamburger buns, pizza, corn bread and much more.  A fabulous book that raises no-knead baking to new heights! I modify slightly by using whole grain flour exclusively (no white flour), and the recipes in this book turn out wonderfully well anyway.

If you need to buy bulk whole grains, I have them too.

Hard white wheat makes a high protein, light whole grain bread!  My favorite!

Hard red wheat grinds to an excellent bread flour that has that nutty whole wheat taste and a darker crust.

An excellent sweetener for baking: Xylitol.

If you need a grain mill, this one can’t be beat!  I’ve tried every mill on the market, and like this one the very best.

If you prefer a hand mill, I recommend the Wonder Junior Hand Grain Mill.

{ 0 comments }

Artisan Bread, the Super EASY Way!

Wheeee! I am SO excited!  I am making delicious, healthy, crusty, chewy, wonderful bread every day with almost no work involved! No kneading!  No electric bread mixer. Sound too good to be true?  It really is easy!

I used to always be on the lookout for good, European-style bread.  The grocery stores seldom have it, and if they do it is made from white flour and has a hefty price tag on it.  I would buy what I termed “good bread” from specialty bakeries for special occasions.  Although I baked my own bread often, my recipe was for traditional loaves of sandwich-type bread, not the tantalizing, crusty, chewy loaves of bread I remember from Europe.

Then a friend introduced me to the super simple method of making artisan bread without kneading.  It seems too good to be true, but after making 20 loaves in one week, I am here to tell you that it is  ridiculously easy, fast and foolproof.  It has revolutionized bread at my house! No need to buy it at the grocery store when fabulous bread is this easy to make.  And it only takes 4 ingredients:  flour, salt, yeast and water.

I want to show you how easy this is!  Let’s go step-by-step:

How to Make Super Easy No-Knead Artisan Bread

#1 Get out a big plastic bowl with a lid, the kind you make potato salad in.  It can be a glass bowl with a pan lid, if need be, but not a metal bowl.

#2 Put into the bowl:

  • 7  1/2 cups whole wheat flour from hard white wheat (preferably), freshly ground if possible.
  • 1   1/2  tablespoons instant yeast
  • 1 tablespoon salt
  • 3  3/4 cup lukewarm water
  • optional: fresh herbs (1 teaspoon rosemary leaves and 2 teaspoons fresh thyme leaves) or dried herbs (use half as much)

Just stir to moisten all ingredients.  Resist the urge to work it or knead it. Put the lid loosely on top of the bowl. Leave it on your kitchen counter.

That’s it! After at least 2 hours (but up to 18 hours), the bread dough is ready to form into boules (the round artisan loaf in the picture).  No, you don’t knead it!
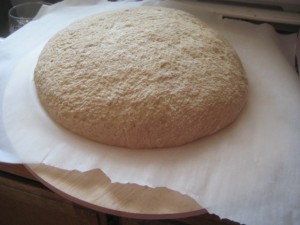
#3 To form a boule, just flour your hands and reach in to the bowl and scoop out half of the dough.  Don’t squish out those beautiful air bubbles, that are so desirable in artisan bread. Quickly and gently shape it, or just plop it down on a piece of  baking paper or parchment paper—it will still be great and will look artistically shaped! You can flour-coat the wet dough if you want to shape it a bit more, but don’t incorporate much more flour into it.  I lay the baking paper on a cookie sheet (without sides) or wooden cutting board, so I have a rigid surface to use when sliding the baking paper into the oven.

#4 Let the dough rise for 40 minutes.  After 20 minutes has passed, turn your oven on to 475 degrees.  Put a pizza stone or cast iron griddle in the oven.  Or a cast iron frying pan.  I have even used a cast iron Dutch oven lid turned upside down!  You just need a heat-retaining cooking surface that is very hot when you put the bread dough on it, to create that fabulous crustiness.  Put your stone or griddle into the oven when you turn it on so it can heat up.  Also put into the oven:  a metal broiler pan or cake pan filled with approximately 2 cups water to create steam while the bread bakes, which makes a delicious crusty loaf!

#5 When a total of 40 minutes rising time has passed (20 minutes of which the oven is heating), open the oven and quickly slide the baking paper with the bread dough onto the pizza stone (or cast iron surface) and shut the oven door as fast as you can to keep the steam in!  The baking paper will not burn, nor stick. It’s great stuff!

#6 Bake for 35 to 40 minutes. Remove from the oven and slide the bread off the baking paper to a cooling rack.  The bread should be brown and crusty looking and make a hollow sound when tapped on the bottom. Makes two (1.5 lb.) boules.

That’s all there is to it!
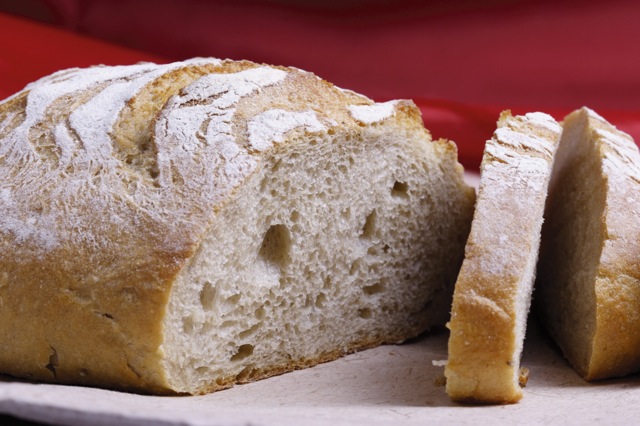
Yum! Lovely holes inside, crusty outside!

A big bonus to this recipe is that after you mix it up, and let it set on the counter for a minimum of 2 hours, you can put the loosely lidded bowl into the refrigerator for up to two weeks and it will still make magnificent bread!

Q & A

*What is the dough supposed to feel like?  This is so different from the bread dough I am used to working with!

The ingredients will stir together without the need to use your hands to mix it.  After the 2 hour rising period, it will feel wet and sticky, rather than being a dough that you can handle.  As flours vary in their moisture content, add a little bit of water (up to 1/4 cup) if you are not getting a wet enough dough. Wetter dough results in more big holes in the bread and a tender texture, but a flatter loaf.  More flour results in a denser bread, not so desirable, but a higher loaf.  Somewhere between is the perfect medium.  Adding part unbleached white bread flour will also give you a higher loaf, but I prefer whole grain and flatter.

*How long can the dough set out on the counter?

It must stay out for at least two hours loosely lidded until it rises and falls or flattens out.  (Don’t punch this down—just leave it be.) This rising and falling apparently develops the gluten and replaces the kneading process.  After the required two hour period, you can continue to let it set out on the counter (up to 18 hours total), or you can refrigerate it for up to 2 weeks.  If you let it set out on the counter overnight, it will develop a hint of sourdough flavor, which I like.  There is nothing in the recipe that will spoil, but the yeast continues to do its thing, creating a strong yeast odor that you will smell when you form the dough.  It is not spoiled—the bread will be delicious!

*When I shape the refrigerated dough into boules, how long do I let them rise before baking?

Add an hour to the normal 40 minutes rising time, to let the dough warm up.  It is easier to form refrigerated dough, so that is a benefit.

Rising times:

Refrigerated dough:  1 hour 40 minutes rising.

Non-refrigerated dough takes 40 minutes to rise.

*Where do I get baking paper?

Any grocery store! I sell a good quality baking paper  also.

Alternately, you can sprinkle your surface thickly with cornmeal and then attempt to slide it into the oven.  I just find baking paper so much cleaner, neater and easier!

*My refrigerated dough looks weird.  Will it still work?

Whole wheat flour can create a darkened, almost purplish look, on the top when it sets in the fridge for a few days, but it doesn’t hurt anything. You can scrape the dark liquid off before using the dough, if you wish.

*How do I get the pretty top on the bread?

If you want sesame seeds, poppy seeds, sunflower seeds, and/or oatmeal on top of the finished loaf, just sprinkle on top of the wet dough after you shape it.  Or you can wet the top of the risen loaf and sprinkle it on just before sliding into the oven.

After sprinkling on the seeds, you can slash 1/2″ deep with a knife that has been dipped in flour (to make it cut more easily) or snip the top of the dough with scissors.  If you have flour coated your bread dough, and slice through it, it makes a pretty top! (See photo above for flour-coated bread.)

If you want a shiny brown top, brush with an egg wash (beat 1 egg + 1 tablespoon water).  It’s super easy to do—spread it on with your fingers, or a spoon, if you don’t have a brush.  Makes the loaf look very professional!
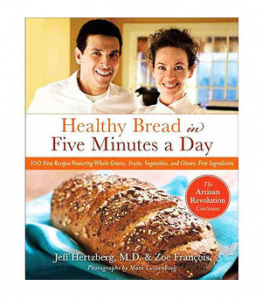
Excellent how-to book with lots of recipes!

*Do you have more recipes?

Although there are several books on the market, the best book I’ve found for this easy method is Healthy Bread in Five Minutes a Day. It has lots of helpful tips and countless wonderful recipes for every imaginable variation:  breads with raisins, cinnamon, dried fruit, veggies, herbs, whole grains, pizzas, ethnic breads, gluten-free breads, and much more.  A fabulous book that raises no-knead baking to new heights!

Hardbound book contains 100 fabulous recipes for healthy ethnic breads, whole wheat hamburger buns, pizza, corn bread, and gluten-free baking.  Although they often use a mix of white flour and whole grain flour, I use only whole grain flour and the recipes turn out great. Bake your own artisan breads for just 40 cents per loaf!  Color photographs will make your mouth water.  A whopping 336 pages.

If you need to buy bulk whole grains, I have them too.

Hard white wheat makes a high protein, light whole grain bread!  My favorite!

Hard red wheat grinds to an excellent bread flour that has that nutty whole wheat taste and a darker crust.

If you need a grain mill, this one can’t be beat!  I’ve tried every mill on the market, and like this one the very best.

If you prefer a hand mill, I recommend the Wonder Junior Hand Grain Mill.

Happy baking!

P.S. Try:  Sweet Breads, the No Knead Way
{ 5 comments }

Tired and Stressed Trying to Make the Kids Obey

Question:

Hi Diane,

I am having a conflict and thought maybe you could help me. I have been cracking down on my kids because I am convicted that I have not required quick obedience. In doing so our relationship has been strained and I am much more drained. I am not sure how to require respect and at the same time work on enjoying them when they are fighting me. Does anyone besides me struggle with this? I am really tired. I love my kids and want so much to just enjoy them but I don’t feel they respect me. It is mainly during school and at bedtime and chores they resist me.

Answer:

I hear you, and I know how rough that can be. I totally agree with you that first-time obedience is important. I think the key is the climate in the relationship.  Being playful might be a wonderful antidote for the stress you are feeling.  It adds an element of fun, and makes obeying you more like a game for your kids.  Your facial expressions—how relaxed and happy you are when you interact with them—can change their perception of you as the meanie into you as the warm and loving mother that you are.  And being playful may change your stress level a lot.

Let me tell you about an interchange I had with my usually very grateful son. Though he is is grown  up (19), playfulness still works!  I had really extended to help him get a needed dentist appointment set up within a short time frame and at a discount price.  When he came home from the appointment, he sat down to eat something, and was complaining a bit about it—it hurt, it was inconvenient, etc.  Naturally I felt a bit annoyed that my efforts were “boo-ed” instead of “hooray-ed” and it was causing me stress to hear him.  I started to express my negative feelings at hearing him complain, but that only deepened the gloom.

Suddenly I felt inspired to change courses and try the playful approach.  I jumped up from where I was sitting, and grabbed a plastic hanger that I saw nearby and I started chasing him, telling him in a very exaggerated silly way, how naughty and ungrateful he was!  He squealed with laughter and took off running.  I stopped chasing him and hid behind the door where I could attack when he returned. We had a very stress-relieving duel with hangers and lots of laughter.  I heard him repeat the story to his siblings a few times during the evening.  He got my point (to be grateful) and our relationship was strengthened.

Life can seem restricting and heavy to kids, I think.  Seeing how things look through their eyes helps me to want to make life more fun. Here’s a few different approaches you might try:

* Be playful and tell them you are going to try to “catch” them first-time obeying and tickle-attack anyone who makes the “mistake” of first time obedience.

*Set up a game to motivate them, drawn on poster board that you put up on the wall where they can see it.  Let your kids advance their sticker markers one space towards some end goal (such as playing a game with Mom) each time they first-time obey.  Make sure there are not too many spaces to go until the reward or they will get discouraged. Put a few short chutes and ladders (that go up) to keep their interest.  For little ones up to about 5 years old, the reward should come within a day’s time, so make it simple enough that you can do it.  As children move towards the 8 to 10 year old range, the game could extend over a few days without losing motivation.

*Stop frowning.  Child discipline can string us out, no doubt about it.  But through a child’s eyes, it seems we are displeased with them.  Smiling makes a big difference all the way around . . . to you, to your child, to everyone in the home atmosphere.

*Make it beneficial to obey. While we want our children to obey just because “it’s right”, that is a bit unrealistic.  (Some adults even have trouble with it!)  If you want something (in this case, first time obedience), make it worthwhile to your child.  Set a reward and cheer him on toward the finish line.  Be on his side!  Applaud him on to victory! You and him v.s. the clock (or the sticker chart, or whatever you set up to motivate him). Stop fighting him and jump on his side: help him win at whatever you are requiring.

Respect is something that you must give to them in order to expect it back. Respect comes from being unchangeable—always keeping your promises, being dependable, following through, being consistent—and from being honorable, kind and loving, fair, with clear boundaries of what you expect. It is earned by interacting with your children in the way you want to be treated.  Listening to them, considering their opinions, treating them like a valid person who you enjoy being with—these things will help your children respect you.

“Kind and firm” is my favorite phrase, when it comes to child discipline.  To me, it sums up the ideal parent.  It is possible to be a loving, playful, happy mama who won’t budge on the important stuff, and whom her kids adore, obey and love to be with.  It takes constant effort and there is always room for improvement, but it does get easier day by day, as the children learn what you expect and how to obey you.

For me, safeguarding the sanctity of the relationship is of more importance than first time obedience.  I strive for first time obedience, but not at the expense of long term strain in our bond. When you truly enjoy them, love them dearly and treat them as your best friends, you will find you have enormous influence.  They will want to please you.

Training children requires daily effort and you don’t see the results for years, but in the end, all your attention, sacrifice, love and devoted teaching will bear fruit!  If you are happy and love them more than your own personal time, your hobbies, your friends, your work, your interests, your self; if they know for a fact that only God and Daddy come before them in your life, there is a power in that love that makes it difficult for them to disobey you, their best friend, nor wander very far from your lifestyle or your values.

Best success,

Diane

{ 0 comments }

Gimme Praise!

Louisa drooling over the Stradavarius violin at the Smithsonian!

Yeah!  I did it again! I pulled right up in the parking lot just as Louisa was opening the door of the building to walk out into the parking lot from her violin lesson!  Hey now, I am fantastic!

Louisa swung the car door open and gave me a “high five”and said, “You are the coolest!”

“Yep, I sure am! I wanted to finish what I was doing, but instead, I disciplined myself to come get you ON TIME, once again, mind you!”,  I sang out.

I am learning a new habit. Yes, this is my last child of seven, so it may seem a bit late, but we are ever trying to improve ourselves, aren’t we?  And I am disciplining myself to be quite punctual.  At Louisa’s request. Because waiting out in winter weather doesn’t feel the best.  I admit this is not my strong character trait.  Whatever I am deeply involved in (today it was bread making) seems to take on unique priority and it is hard to tear myself away until the very last moment.  Which usually makes me about 10 minutes late. 5 on a good day.

Praise has an amazing affect!  We know it works on kids and husbands, to smooth the way and help them feel appreciated.  But it is funny to me that it works on me just as well! As long as Louisa keeps giving me “high fives” and telling me that I am “the coolest” for picking her up on time, I’ll probably have a very good reason to continue giving it the extra effort.

My mom used to tell me about how my stepfather trained her out of making tuna fish casserole for dinner.  He hated tuna fish. He never said it in so many words—unless someone asked him directly I suppose—and even then I think he probably sidled out of it somehow.  He was not a complaining sort of man.  He was a man of few words, but at mealtime, he usually had some simple pleasant words to say about the food.  But on the days my mother made tuna fish casserole, he didn’t have anything to say about it. Just the absence of those approving words was enough to train her out of making the dish he did not like. As for my home, my husband gives great exclamations of delight when I make hamburgers. Not that I think it is all that healthy.  But that is what he loves,  and he has trained me to please him just by being so delighted. We all want approval, and praising words are worth working for.

Kind words can ease the way with a stuffy supervisor or a rude clerk.  If I see it coming when I am in line at the grocery store, I make sure that I strike up a conversation once I make my way up to the check-out.  I mention how busy the store is and how hard it must be to be on your feet all day checking so many customers out, and it is amazing to me how it softens the attitude of the clerk.  Not always. But enough times to confirm that the need for sweet words is a universal longing for understanding and kindness.

Overly praising is not what I am talking about. I cringe when school teachers pass out a “certificate”to every child, as if they fear ruining the other children’s self esteem to acknowledge just those who have really achieved. We’ve all seen moms who turn on the sugar to manipulate their children, or who praise them even when they are being brats.  What I am talking about is genuine praise—those heart-felt words of appreciation and approval that are so welcome when one has actually put forth an extra effort.

Critique and sarcasm (the opposite of praise) are rampant in today’s culture. I think there is some value in looking at issues with a discerning eye.  But I have learned a lot by observing my friend, Danielle, who always manages to diplomatically say just the right thing whenever feathers are ruffled. Even if she does not agree with the other person’s opinion, she makes peace with her soft, delicious words of praise.   Since wars are started over words— “fighting words”—then Danielle’s words must be “peace words”. Watching her, I wonder if world peace really could exist, if we all learned to talk like Danielle!

Of course, God’s approval is what ultimately matters. But we’re human, and we are all hungry for acceptance— to know that our efforts to please and do right are acknowledged and appreciated by other human beings. Why not lavish it on anyone who deserves it, no matter how small their effort? Why not dish out praise to those you live with and work with? It is free, easy and makes the world so much happier of a place for all of us!

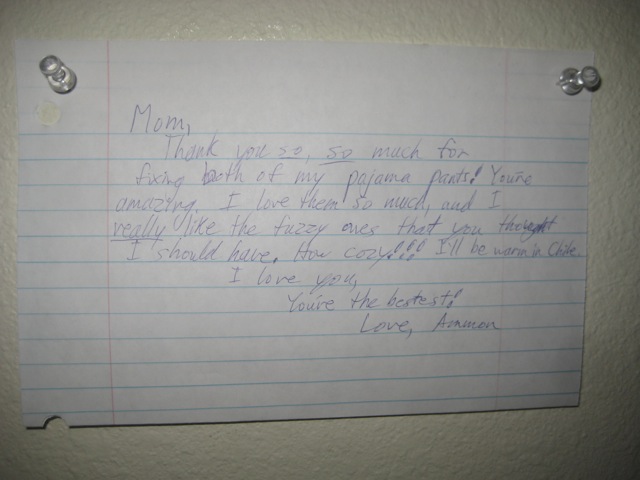
On my bedroom wall, I pinned up a note that my son Ammon wrote me before he left for Chile. Kind words mean SO much, don't they?

{ 0 comments }

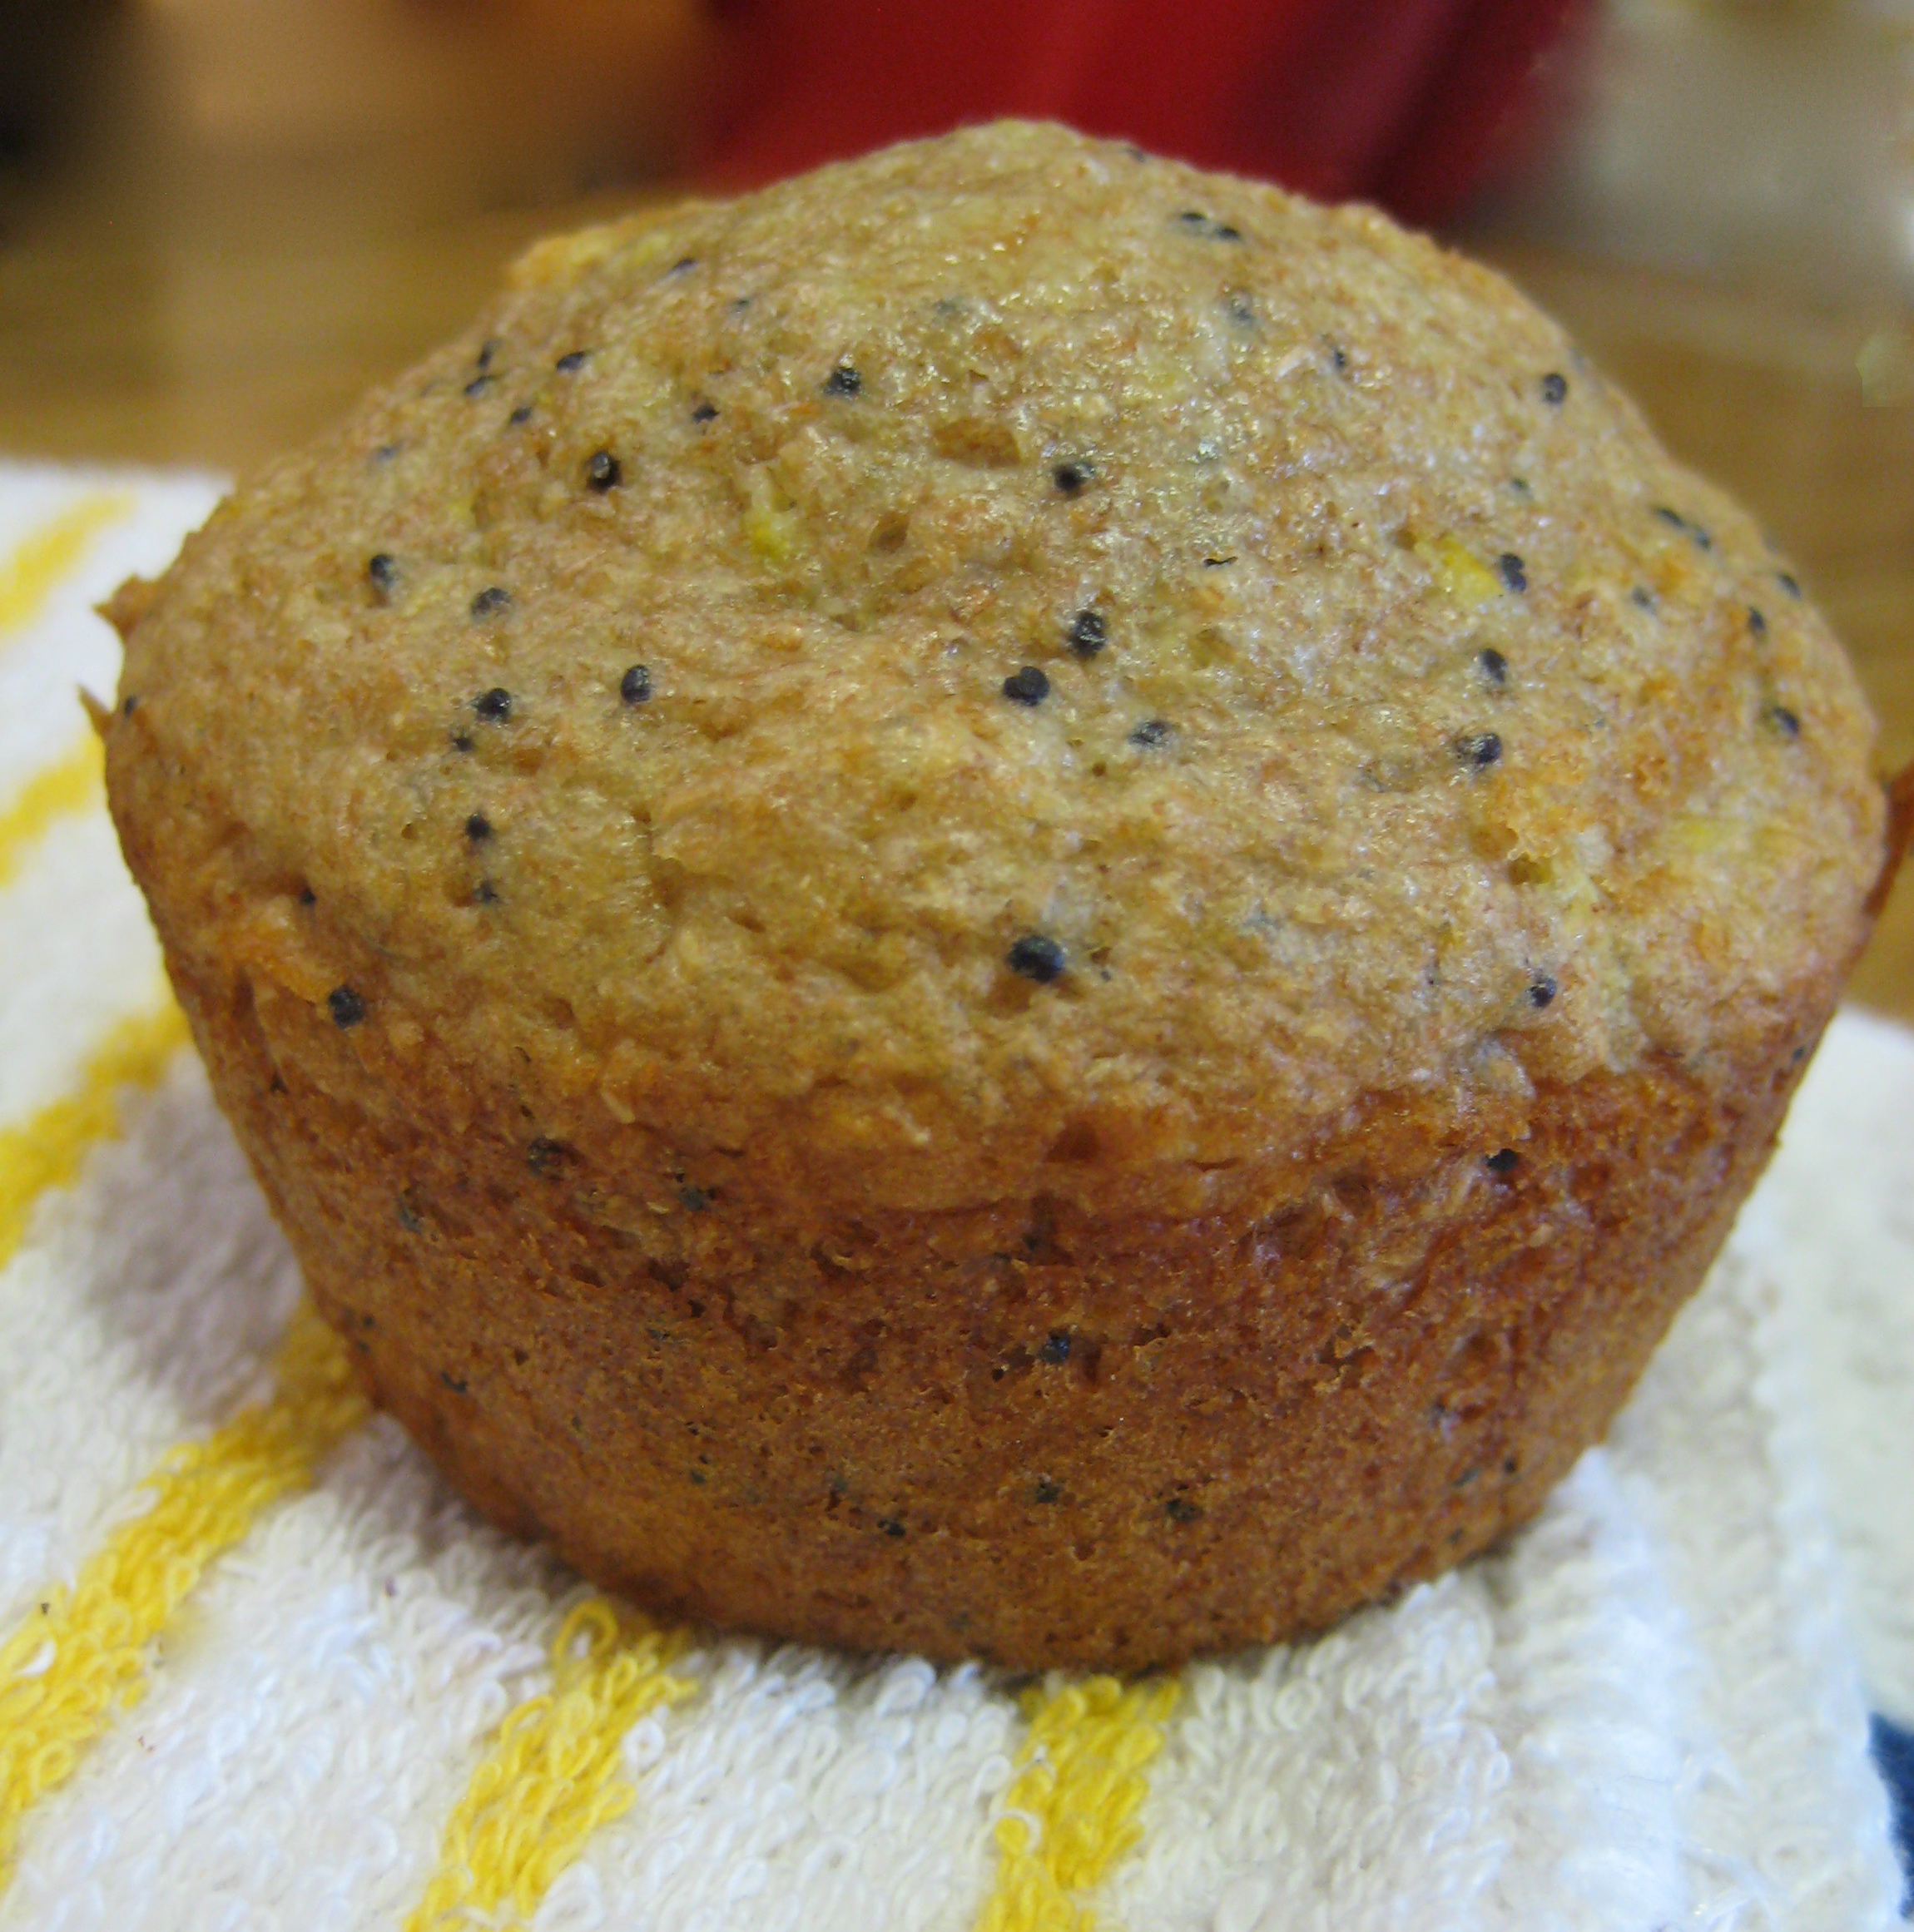
Whole Grain Lemon Poppy Seed Muffins

These are the real deal—not a white flour, sugar laden price club version of muffins.  Treat  yourself to whole grain goodness with these tangy, delicious muffins!

Lemon Poppy Seed Muffins

A recipe from Julianna’s kitchen

4 c. whole wheat flour, freshly ground preferred
4 t. baking powder
2 t. baking soda
1 t. salt
1/2 c. poppy seeds

Mix dry ingredients well. Then add:

2 c. plain unsweetened yogurt
2 eggs
1 c. honey
1/2 c. fresh lemon juice
2 t. vanilla
4 t. lemon zest (grate the lemon peel with a fine grater)

Gently stir all ingredients until just mixed. Fill muffin tins 2/3 full. (Resist the temptation to overfill, or the muffins will over-expand and drop, making their tops flat.) Bake at 350 degrees for 15-20 min until the tops are starting to get golden brown and a toothpick inserted comes out clean. Makes approx. 27 muffins. Yum!

Today’s Guest Blogger: my daughter Julianna!

Hi Friends!

My new husband and I are doing great and enjoying our 5th month of married life. We are living in the back half of an old pioneer house, and I’ve had a ball decorating and making the old place look like home. I’ve also been busy trying new recipes, as being a wife means lots of fun cooking daily. Michael has been asking for lemon poppy seed muffins, as they are his favorite. After some trial and error, I developed a healthy and delicious recipe!                 —Julianna (Hopkins) Spencer

{ 0 comments }

Daily Ice Cream

Daily ice cream! Sounds like every kid’s dream, doesn’t it?

We have ice cream at my house every day—almost.  We might even eat it for breakfast!  That’s because Louisa makes it any time she feels like it.  And why not?  It is really only the healthy ingredients you eat at other meals:  raw milk, unsweetened plain yogurt, vitamin-packed fruits and nuts.

You’ll need an ice cream maker if you want to get serious about making daily ice cream.  After a lot of research, we bought the Cuisinart Ice Cream Maker, model ICE-30BC. This is the simple, basic unit and you can find it online or in the price clubs for about $59. There are a lot of fancier ones, but the basic unit is the same, so no need for extra features really.  All you need is that marvelous canister that has the refrigerant fluid in its walls.  When you take it out of the freezer, and pour your ingredients in, the motor part just rotates the canister to churn it into ice cream.  It is a very simple machine, easy to use and works great for making healthy-ingredient ice cream!

Here’s her recipe:

Louisa’s Daily Ice Cream

milk (raw, whole milk is best, but you can use 2% grocery store milk and it works out fine)

optional: plain yogurt (non- sweetened, whole is best, non-fat is okay too), cream, or coconut milk

fruit (frozen works best, berries, peaches, mangos, bananas, etc.)

nuts (chopped pecans, walnuts, almonds, peanuts, macadamia nuts)

sweetener (raw honey, xylitol, stevia, very ripe sweet fruit, date sugar, real maple syrup, or frozen juice concentrate)

The fresher, more wholesome your ingredients, the better this will taste and the healthier it is for you!  Assemble the ice cream maker, using the canister straight from the freezer. Turn on ice cream maker, so it is churning when you pour in your ingredients.

1. Pour in milk to fill the canister halfway up while it is rotating.

2. Optional: add a cup of  yogurt, cream, coconut milk or coconut cream to the canister.  (Note:  you can use coconut milk to replace all the dairy in this recipe if you want).  If you don’t use any of these additions, pour another cup of milk into the canister.

3. Add a healthy sweetener.  Combining a little of each actually gives a better taste.  I usually use 3 tablespoons of xylitol and a dropperful of stevia for a sugar-free ice cream.  Taste is while it is churning, and add more if necessary.  You can make a great ice cream with raw honey.  If your use fresh, ripe, very sweet fruit,  you may not need any sweetener.  If you use yogurt, you’ll need more sweetener to balance the tart taste. I like the “cheesecake” taste that yogurt adds.

4. While the ice cream is churning, add about 2 cups of chopped frozen fruit, such as raspberries, strawberries, blackberries or peaches.  If you add them at the beginning of the churning process, the berries will disintegrate and turn the ice cream a lovely pink or purple color.  If you want chunky fruit pieces, add the fruit at the end of the churning process.

4. If you like nuts, add them when the ice cream is almost ready.  Chopped walnuts, macadamias, cashews, pecans, and even peanuts make a delicious and healthy addition.

Here are some tasty combinations:

Raspberry Pecan

Mango Macadamia

Peach Walnut

Banana Peanut

Strawberry Almond

The more fat content in your milk and yogurt, the creamier and more “store-bought” your ice cream will taste.  I don’t like it too creamy, though.  I prefer the lighter fresh taste of ice cream made with milk and low-fat yogurt.  When I find it on sale, I have used a pint of whipping cream in place of the yogurt and it makes a very rich and creamy treat!

That’s it! Just put in the ingredients and let it churn for 15 minutes or so, until the ice cream is frozen, and serve immediately.  Scoop out the ice cream canister, rinse out quickly in cold water and put it back in your freezer before it thaws and you can have ice cream again without waiting for the 24 hour necessary freezing time. If you have leftovers, store loosely (don’t pack down) in a plastic container.  Take it out of the freezer about 15 minutes before serving.  The less fat in the ice cream, the harder it freezes.

Dreaming of chocolate? While this is not my choice for daily ice cream, it is a nice treat once in awhile! I like to use  Chocolate Delight (a combination of real Brazilian chocolate and powdered stevia natural sweetener) to sweeten and make a Fudgsicle-tasting chocolate ice cream.  Walnuts added to the mix are yummy.

Now you can say “yes” to ice cream—every day if you want!

{ 0 comments }