≡ Menu

School Snacks

There are a lot of creative homeschool moms in this world!  This great idea from Machiel and is sure to lighten your load and give your homeschool some zip:

If you’ve got many young children at home, sometimes lunch can be a lot of work. And making the transition from school, to lunch, and possibly back to school is difficult and time-consuming.  Or kids get hungry early, shortening your schooltime.  Try having School Snacks instead of lunch!

School snacks are just healthy munchies served up on a fun tray.  Instead of breaking momentum, school can keep right on going. Kids can snack while Mom reads to them, they listen to something, or everyone can have a school break and just enjoy. Sit on the floor, picnic style. No dishes or utensils to wash. No high chair. No mess. Very little clean-up (especially if you spread a tablecloth, picnic blanket or beach towels down on the floor first).  Have some water bottles or sippy cups, plus napkins handy— and you’ve got lunch!

I buy cute, seasonal trays inexpensively on sale right after holidays. Those colorful plastic molded trays are usually less than a dollar, and are appealing to the kids.  I bought a Valentine’s tray at the end of February,  a shamrock shaped St. Patrick’s tray right after St. Patrick’s Day, and more, on clearance. These work great for School Snacks!

Heap your tray high with nutritious finger foods. Here’s some ideas:

Grapes

Carrot sticks

Cucumber chunks

Red or green pepper chunks

Celery sticks

Olives

Cheese chunks

String cheese

Peanuts

Raw walnuts or pecans

Blueberries

Strawberries

Chunks of whole grained bread

Mini muffins

Sprouted almonds

Whole grain crackers

Popcorn

Sunflower seeds

Whole grain croutons (doesn’t every kid wish you’d let them eat them off the salad?)

Raisins

Dates

Dried apricots

The idea is to load up your trays with healthy foods that are non-messy. Let the kids help themselves.  These are nutritious foods we would use as ingredients in our meals anyway, only in their more natural state.  And kids love the novelty of an indoor picnic eaten with their hands!  If a child eats peanuts and fresh strawberries, it’s an improvement over peanut butter/jam.

Try School Snacks.  Your kids will love it!

{ 0 comments }

D.E.A.R. Camp at Your House

My friend, Gloria, is the mom of many boys, and she just shared a fabulous idea that she uses in her homeschool.  One day a month, Gloria holds “D.E.A.R. camp”.  D.E.A.R. stands for:  “Drop Everything And Read!”

Gloria used to draw a number out of a hat and that would be the date during that month that they would toss aside normal routine and set up the tent and read all day.  Now she has planned on using the 4th Wednesday of each month, so everyone can look forward to it.  Any way you choose it, kids love to camp and I think you’ll have enthusiastic energy for this fun, educational activity!

Gloria starts her D.E.A.R. camp day with a real camp-style breakfast.  Then they set up a tent in the living room—or build a fort with blankets and pillows in front of the fireplace—and “camp out” reading all day long. They enjoy hours of reading:  silently and aloud, and they play phonics games too.

“It does a homeschooling mom’s heart good to have days like this once in a while!” Gloria says.  I agree!  The fun and novelty of it keeps the kids happy in homeschool. And that break from routine, of teaching math and juggling it all, is good for Mom too!

If your kids are feeling restless or you’re getting a bit burnt out, maybe it’s time to “drop everything and read”, camper’s style.

Don’t forget the s’mores!

{ 0 comments }

Happy Mother’s Day!

A tribute to you devoted mothers:  I can feel heaven smiling on you  . . . for all the good you do, for all the love you give, everyday.  You have my admiration!

Love,

Diane

{ 0 comments }

Teaching an Older Child to Write

Question:

I have a 9th grade daughter that really struggles in writing. She does not like writing so it has always been a battle and I have not pushed it nearly enough. Now I find she is really behind in writing and I am feeling panicked because writing is so important to every other subject. Do you have any suggestions of how to help an older student learn to be a better writer? I really feel like I have failed her.

I do have your Journal and Language Arts program and will be using that with my 4th grade son soon. Should I use that to get my daughter started too?

Answer:

Yes, I would start your daughter on the Journal program too.  It is a great way to learn to write!  You can use a notebook with wide ruled paper (or have her type it on the computer, teaching her how to use the spell check feature).  Every day, have her write a journal entry of at least 3 paragraphs.  At first, do not comment on grammar, spelling, neatness, correctness. Just get her writing. She can write about anything she wants—no restrictions on topic or use of slang, etc.  You are just trying to get her writing.

So, for the first week, have her write her 3 daily paragraphs.  If this is too overwhelming, start with sentences—such as 5 sentences, and then move up your requirement every few days or week, until she is writing 3 paragraphs per day.  If she is totally stumped, get Kids Talk and have her choose a card to write about each day.  Note: this is not her private journal, which she will keep on her own. This is her “School Journal”.  She can choose any subject, but you have to be able to read it.

Once she is writing daily and it is going smoothly, then it is time to ease her into self-correcting. Start by teaching her the spell check feature on your computer—misspelled words are visible as the underlined words.  Teach her how to check the word using the spell check feature.  Have her copy and paste the corrected word onto a spelling list document. This spelling list should be studied daily, along with the new words being added to it daily from her writing.  On Friday, give her a spelling quiz.  Any misspelled words from the quiz go onto next week’s spelling document.  Have her print the corrected version, hole punch it, and store it in a binder.

If she is doing her writing by hand in a journal,  have her write in either pencil or erasable pen so it can be corrected, and when you check her work, put a little erasable tick mark in pencil at the beginning of the sentence that has a misspelled word, and let her try to figure which word it is.  Often she will say, “Oh, I thought that was misspelled” and identify the word.  Have her correct the word and add it to the spelling list as described above, and study for the Friday quiz.  A book I really recommend is How to Spell it, because no matter how the word is spelled, she will be able to find it in this handy book, and correct the spelling.

Keep working on having her identify and correct her spelling for a few weeks.  If she is misspelling a large number of words, then just choose the most common words to correct.  Work at it gradually until she learns those words and can spell them correctly in her writing, and then move on to correcting more words.  Don’t overwhelm her. Nobody wants to write if they have to go back and correct every third word! Ten spelling words per week is plenty.

As soon as she adjusts to having her spelling corrected and to working on looking things up (before she misspells them), you can move on to the next step, which is getting her punctuation correct, and making sure she capitalizes words properly.  You can find the rules for punctuation in my Journal and Language Arts program.  I also recommend Writing in Style as a good overview.

Keep going with this, working through the mechanics of good writing, all via her daily writing (on her choice of topics).  Don’t worry about topic. My son spend an entire year writing about knights and medieval times and how to build catapults, and his writing still improved dramatically!  The topic doesn’t matter, and allowing them total freedom to choose a topic keeps their interest high.

When she is accustomed to daily writing, and is able to correct any errors you note when you check her daily writing, she is ready for a good writing program.   I like the Wordsmith series, starting with Wordsmith Apprentice.

Just ease into it, step by step, and you’ll soon see her writing improve dramatically, and maybe she’ll really enjoy it and want to write stories, poems and more.

You’re on your way!

{ 0 comments }

English Muffins, the Easy Way!

If you think I’ve gone a bit too far on making my own no-knead bread, you are probably right! I just keep on thinking up new ways to make this amazingly easy bread dough into home-baked nutritious food for my family!

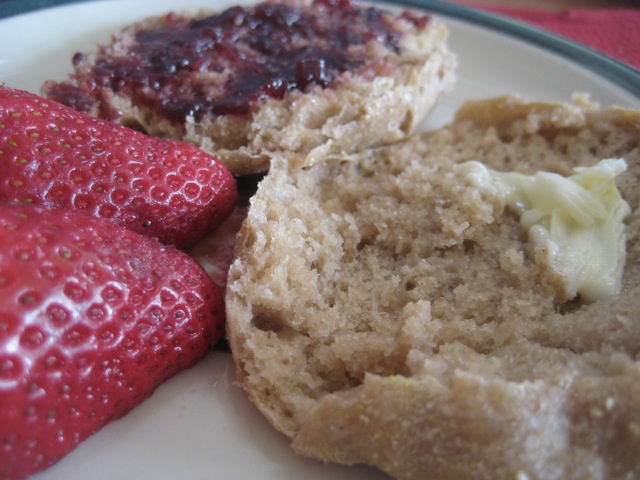
Here’s how it came about: I had bread dough in a loosely covered bowl on my counter, and no time to bake it before breakfast. Out came the pancake griddle. I put it on 350 degrees and scooped a spoonful of dough onto the griddle, being careful not to squish the bubbles out. Once it looked brown and crisp on the bottom, I flipped it over. Then I recognized what I had made: English Muffins! Yay! Fork-split, with butter and jam, these are definitely comfort food . . with whole grain nutrition!

Since that worked out so well, I decided to improve on it by turning down the heat a bit so they could bake through thoroughly, and by allowing them some rising time. (If you don’t have time to rise, they’ll still taste good—just handle them lightly so you don’t squish out any air bubbles.) Here’s my recipe:

How to Make Easy No-Knead Whole Grain English Muffins

#1 Get out a big plastic bowl with a lid, the kind you make potato salad in. It can be a glass bowl with a pan lid, if need be, but not a metal bowl.

#2 Put into the bowl:

  • 7 1/2 cups whole wheat flour, hard white wheat freshly ground if possible.
  • 1 1/2 tablespoons instant yeast
  • 1 tablespoon salt
  • 3 3/4 cup lukewarm water

Just stir to moisten all ingredients. Resist the urge to work it or knead it. Put the lid loosely on top of the bowl. Leave it on your kitchen counter. After at least 2 hours (but up to 18 hours), the bread dough is ready to form. No, you don’t knead it!

You’ll recognize this as my 100% Whole Grain Artisan Bread recipe. If you use 1/2 of the recipe, you’ll have about 12 to 16 muffins.

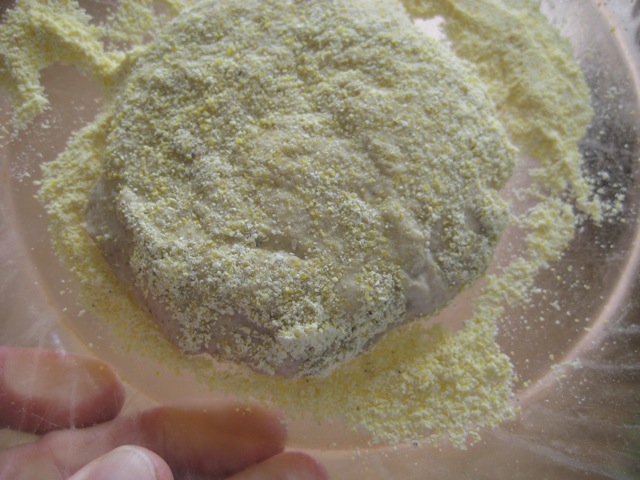
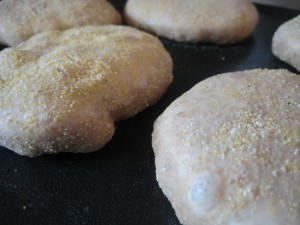
#3 To form English Muffins, pour approximately 1/3 cup of cornmeal onto a plate. Flour your hands and lightly scoop a golf-ball-sized ball of dough out of the bowl. Plop it gently down into the cornmeal and flip over. Pat it every so lightly into a round shape about 3/4″ thick. Lay it on the cold pancake griddle.

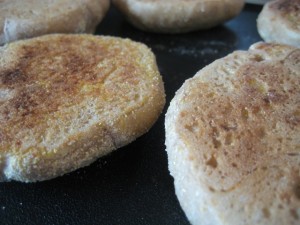
#4 Let the dough rise for 20 minutes (one hour and 20 minutes for refrigerated dough). Turn on pancake griddle to 300 degrees and bake for approximately 10 to 15 minutes on each side (depending on the thickness of the muffin). When the bottom of the muffins are brown and crispy, flip with a pancake turner and let bake on the other side. Cool on cooking rack.


#5 To serve, split the muffin in half lengthwise using forks to maintain the wonderful texture. Serve with butter and jam.

Whole grain fresh baked English muffins!

{ 1 comment }

Easy Elegant Easter Bread

Louisa and  I are having fun baking!  This Easter egg bread was super simple to make using my Whole Grain Artisan Bread recipe.  Here’s how:

Follow the recipe right up until it is time to form the dough (step 3).  Divide the dough into two parts.  Flour a working surface and gently roll each part of the dough into a long “snake” or rope, adding flour as needed.  Lay the ropes side by side, attaching them together at one end by pinching and twisting the dough to adhere.  Twist the two ropes around each other.  Lay on a greased cookie sheet or parchment paper on a cookie sheet.  Attach the ends together to create a circle.

Beforehand, dye raw (uncooked) eggs by dipping them in a cup with food coloring until bright! Let dry.  Dab a small amount of coconut oil, shortening or olive oil onto your fingers and lightly coat the eggs.  Gently pull open the  twisted ropes and insert an egg here and there.  Let dough rise uncovered 40 minutes.  Whisk together one egg and 1 tablespoon water and brush generously onto the risen bread dough to get a golden, shiny crust.

Preheat oven to 350 degrees 10 minutes before rise time is up, if you are using a cookie sheet.  If you have formed the bread on a piece of parchment paper and are going to slide it onto a pizza stone, then preheat the oven for 20-30 minutes so your stone gets nice and hot.  (We are not trying to get a crispy crust, so there is no need for the pan of water or the high oven temperature.)

When rise time is up, bake for 45 minutes or until golden brown. The eggs will cook right along with the bread!

Fun, festive and super easy!

Enjoy, and Happy Easter!

{ 0 comments }

Reviving Stale Crackers and Snacks

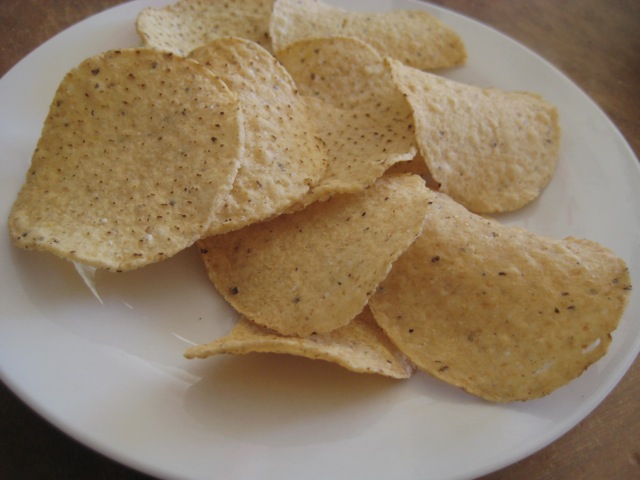
Toasted to perfection . . . stale chips taste fresh again!

We all sooner or later end up with a box of stale crackers or bag of stale tortilla chips.  It makes me feel bad to throw them away, so I found a way to revive them, and it really works!

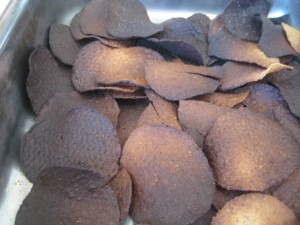
Just spread your stale tortilla chips onto a cookie sheet,  one layer deep.  Pop into a 500 degree oven.  Check after 3 minutes.  Tortilla chips are done when they barely begin to get a toasted look.  Don’t wait more than a few minutes before checking again or you will suddenly be surprised with these results (see photo below!).  I ruined TWO bags of chips before realizing that I can’t walk away from the oven!

Works for any stale dry food such as breakfast cereal, croutons, chips, cookies, pretzels, as well as tortilla chips and crackers.   Staleness occurs because moisture gets into the product.  A hot, dry oven is just the cure!

{ 0 comments }

Blessed Kale

I don’t like kale.  In any way.  Really. But it is so good for you, so nutritious, so health promoting, that I sneak it into every dish I can.  And we never taste it!

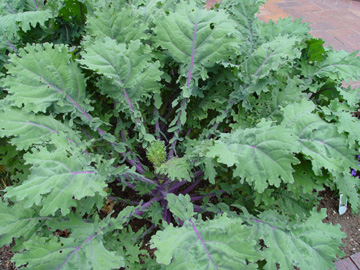
I just went out to uncover my Square Foot Garden, since the sun finally decided to shine!  In the fall, you put your Square Foot garden “to bed” for the winter by removing all the dead stuff and laying a blanket on top, secured by bricks, logs, stones, or whatever you have.  This prevents weed seeds from blowing in, and also gives a little protection.  My kale plants were green and lush at autumn’s end, but I knew our very cold winters would do them in.  Rather than pulling them out, I laid the blanket loosely on top of them just to see what would happen.  When I removed the blanket today, to my surprise little kale leaves were sprouting from the big old dead stalk.  That kale is amazing!  It seems to grow in the worst conditions and be happy about it, too!

A good time to plant kale is while it is still too cold for other plants.  Buy a packet of seeds—it will last you for many seaons.  A little kale goes a long way!  Choose Russian Kale (flat leaf) rather than Curly Kale for the home garden. Easier to wash and no hiding places in the ruffles for bugs. You can continue to plant kale all summer long, and a nip of frost only sweetens the taste. Kale isn’t picky about soil type.  Just  shake the seeds down in a patch of your garden.  I don’t plant in a row, I just scratch the surface of a square foot area and shake them on like salt.  When kale is a small seedling, I harvest it with scissors and put it in salad, leaving a few well-spaced plants to mature further.  From these growing plants, I remove leaves for use regularly.  At summer’s end, the kale leaves are giant, but great for putting in my food dehydrator for use over the winter.  If you are inclined, kale can even be harvested frozen!  Kale is a coarser leaf, so it can be more challenging to make tasty, but I have the sensation that there would be no need for multi-vitamin pills if we could just get kale in our diet on a several times a week basis!

Kale is super easy to sneak into things!  Kale can be shredded, removing the large stiff veins. Add this to stir fry or casseroles when you saute the onions.  A little shredded young kale leaf on top of the pizza is good too! The longer kale sits in your fridge, the more bitter-tasting it will become, so pick and use it right away.  Add some leaves in the blender with tomatoes when you make spaghetti sauce.  It will give  it a richer color, fuller nutrition, and no one will ever guess.  I also dry kale leaves until brittle, crumble it and put it in a shaker jar.  Whether I make scrambled eggs, casserole or soup, I shake some in.  If you like smoothies, kale can easily be hidden in a fruit smoothie if you use a dark colored fruit such as berries, purple grapes, plums to hide the green color.  I like to think every family member gets a leaf of kale per week in their home-cooked meals!

Kale is low-calorie, fabulously high in vitamins and minerals, and full of cancer-preventing, immune-boosting compounds that promote lung and eye health. Kale feels so healthy that I did a little research and found that eating kale three or more times a week was shown to cut the risk of prostate cancer by 35% as found in a study of over 1,200 men (conducted by the Fred Hutchinson Cancer Research Center in Seattle, Washington).  Kale was the most common vegetable eaten by the population of Europe right up into the Middle Ages. It was a stable ingredient in the soup pot. Kale is bursting with vitamins and minerals, plus fiber. Yet the only place kale appears in the American diet is tucked under the steak at restaurants to make a pretty bed to lay the meat on. It is seldom eaten. Funny how we leave the most nutritious thing on the plate!

If you want a quick, easy to grow plant packed with super nutrition, try kale this year!  Your family  will be better off because of it!

{ 0 comments }

Just Kiss Him!

My husband Rick, and our grandson Isaac

I got a good reminder while visiting at the house of a neighbor.  Her husband arrived home from his long work day while I was there.  In he came, having put in his 8+ hours to provide for his little family.  My friend barely changed facial expression.  She didn’t move to embrace him.  No joyful sounds came from her lips.  I felt sorry. I wanted to shout, “Just kiss him!” Just tell him how thankful you are that you get to stay home with your kids while he goes out and battles to keep your boat afloat.  Just jump up from where you are and hug him and have a warm smile of gratitude for him—the man who enabled you to be a mother and who makes your life complete.  Please, just love him!

Such a small effort, and yet it would mean a lot to any man, I’m sure.

I heard of a woman woman in modest circumstances, who gathered her children around when Daddy came home with his paycheck, and she held it up for the children to see.  “Look at what your Daddy has done all week for us, working everyday while we’ve enjoyed life and had playtime too.  Now, Jeff, you can have the shoes you need for soccer, and Katie, you will be able to get your bike tire fixed . . .”  On she went, appreciating the man who put in the labor to keep the family going.  I have to admire that. And it had to make that man feel less tired and more willing to keep at his job.

When my children were younger, they would beg to do things in the late afternoon:

“Let’s go to the library!”

“Please, take us to the store”

The last time that happened, I heard one of my daughters explain to the other, “Mom won’t do that.”

“Why won’t I?” I asked her.

“You never would.  You’d always tell us that Daddy works so hard for us all day long, the least we can do it have a hot meal ready for him.” I hadn’t really realized the lesson I was teaching, but it is one I still believe in.

My neighbor has little children and is very busy daily taking care of them. Her days are not a piece of cake. At-home moms put out just as hard, or harder, of a work day as their breadwinners do.  But there are comforts associated with being home: being free to choose what to do, freedom to lay down on the couch for a few minutes when you are tired, and the joy of being in the presence of your little ones.  It is still a “plush” occupation in ways.

When I lived in southern California, after loading the crockpot for dinner, I would take my brood of little kids to the beach on a summer afternoon.  Although there were the usual mishaps and frustrations—sandwiches in the sand, multiple trudges up the beach to the toilet, having to watch the kids carefully near the ocean—still the scenery was beautiful and we had a wonderful day. We’d be arriving home, sand still on our feet, just about the same time my husband pulled in from work.  I did feel sheepish.

Back to my neighbor who didn’t give any recognition when her husband came home:  I heard a marriage therapist tell how he solved this problem in his life.  He opened the door and sang out, I’m home! I’m home! I’m home-I’m home-I’m home” like a victory song.  It gave the family a needed reminder to stop what they were doing and embrace the man who supports their lifestyle.  That might help my neighbor, but it is sad that our husbands have to ask for it.  We should be the ones remembering, being grateful, embracing the tired man who has worked all day, and having a hot dinner ready for him.

Next time your husband walks in after a long day, my advice: just kiss him!

{ 0 comments }

Lazy Mom’s Lasagna

I am always looking for a quicker way to make a wholesome, nutritious home-cooked meal.  Today’s lasagna was easy and fun to make!  And I didn’t end up with spills on the bottom of my oven, either!  Yay!

Lazy Mom’s Lasagna

Put into your crockpot:

  • 1 -2 lbs. of very lean hamburger, depending on how meaty you like it.
  • 1 chopped onion
  • 2 cloves of garlic, minced

Break up the hamburger and stir the ingredients together.  Turn the crockpot on high, put the lid on, and let it cook for an hour, more or less, until hamburger is cooked through.

Add:

  • 3  (8 oz.) cans tomato sauce
  • 1 (16 oz.) can whole tomatoes in juice, cut with a knife while in the can
  • 1  (6 oz.) tomato paste
  • 1/2 tsp. dried oregano leaves
  • 1/2 tsp. salt
  • optional:  parsley, dried kale or other greens, 1 cup chopped fresh spinach, etc.

I like to add a lot of nutrition-adding stuff to my sauces, since it is a great way to disguise things kids don’t like, such as kale, swiss chard, mushrooms, etc.  I listed those as optional, but sneak in whatever you like.

Stir the sauce together and remove most of it from the crockpot, leaving 1/2 cup or so in the bottom of the pot.

Ready to assemble?  You’ll need:

  • 1 lb. whole grain lasagna noodles, uncooked
  • 24 oz. cottage cheese
  • 1 to 2 cups grated mozzarella cheese, depending on how cheesy you like it

Lay down a layer of lasagna noodles on top of the sauce in the crockpot.  Overlap them—it’s fine. I use whole wheat lasagna noodles.  Break them to fit your crockpot.  Top with cottage cheese blobs, and sprinkle mozzarella cheese over the top.  Spoon sauce on top. Now lay down the next layer of noodles.  Then cottage cheese, then mozzarella and sauce.  End with the mozzarella cheese on top.

Important part:  pour 3/4 cup of water around the inside edges of the crockpot.

Put on the lid and cook on high for about 2 hours, or low for about 4-5 hours.  I like “low” because there is less risk of overcooking the noodles, but if it is almost time for dinner, you better go with the “high” setting.  Test the noodles partway through the cooking time to get them just right.

Easy!  Makes your house smell wonderful all day long.  Ready anytime.  No stress.  Only one crockpot, a spoon and a bowl to wash. Dinner’s ready! Yay!

{ 0 comments }