≡ Menu

Cheap Fun

Singing around our backyard campfire

“All work and no play makes Jack a dull boy.”

And Dad and Mom, too.

There are plenty of ways to have fun with your kids if you are short on money, without biking or swimming . . . although biking and swimming happen to be my favorite ways!  I am the Queen of Frugal and I am here to tell you that even hobbies like biking can be done on the cheap. We’ve bought our share of bikes for $5, my favorite “stores” being: 1) hand-me-downs, 2) yard sales and 3) used sources: thrift stores, Craig’s List, classified, etc.

It is hard not to have enough money, but it is even worse not to have enough Mommy. Fun is an attitude, and if Mom is not engaged with the family, or short on fun, even money won’t make up for it.

When my kids were all at home, one of our favorite evening activities was playing hide and seek in the house.  Boy, did we ever get creative in our hiding places . . . inside cupboards, behind curtains on a wide window sill, up on a top shelf!  We often spooked each other by playing Sardines (when you find someone, you join them in their hiding place, rather than call out. Eventually only one person is left looking for the whole bunch in an eerily quiet house!)

Meal prep often can be a form of fun.  Making pizza can be really fun!  Set up the toppings on the table, and rotate several pizzas around, assembly line style, having one child spread the sauce, another the cheese, and then each in turn adding a topping. You’ll end up with a mess and several gourmet pizzas, some for now, and some for the freezer to make an easy dinner on a night when you or someone else needs it.

My favorite kind of fun is involving my kids in what I am already interested in.  I love to sew, and design swimsuits.  I’ve involved Louisa enough in my sewing and designing escapades that she is getting to be a great swimsuit designer—she’s sewn several new styles for herself!  Identifying and using herbs is one of my hobbies, and Emily and I had a wonderful time gathering comfrey and learning how to make it into healing salve. My husband has enjoyed teaching my kids to star gaze by taking them with him outside to see the stars. Fun with a little accomplishment mixed in suits me fine!

If you are having trouble playing with your kids, start small and inch your way into it. One checkers game. 10 minutes jumping on the trampoline. One short bike ride to the corner and back.  A little every day. We all have too much to do . . . and, if realistic, we all realize that it will never all get done. Take a break, play with your kids and see the amazing results.  You’ll be hooked!

Here’s some ideas for cheap and easy fun:

  • Buy bread off the clearance rack and take it to the duck pond
  • Even cheaper: save bread scraps, unfinished toast, etc. in a bag in the freezer and take it to the duck pond
  • Swing at the park
  • Take a nature walk
  • Eat a picnic under a tree
  • Play in the sprinklers
  • Paint fingernails
  • Read aloud
  • Jump rope
  • Play checkers
  • Plan a skit
  • Watercolor paint
  • Draw a hopscotch in chalk on the front walk
  • Do fun hairdos
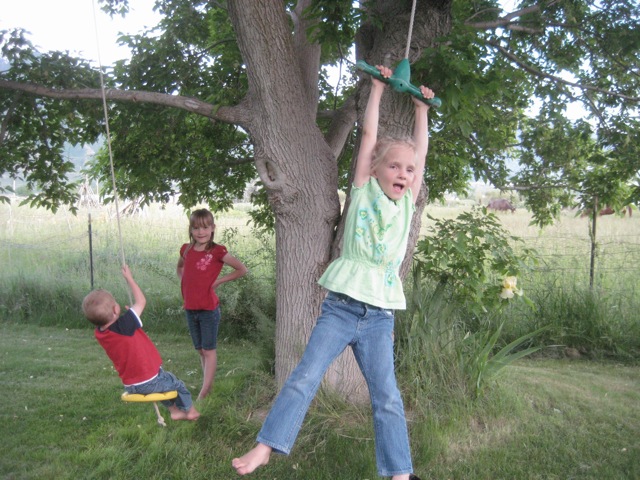
  • Climb trees
  • Dance in the living room (teens especially like this!)
  • Bake cookies
  • Make doll clothes out of scraps
  • Play four-square in the driveway (draw it with chalk)
  • Make a cardboard playhouse out of a discarded appliance box (ask for them at the hardware store)
  • Cut out paper dolls
  • Play instruments together (recorders are cheap)
  • Find pretty rocks
  • Go visit the horses in the field and feed them grass
  • Go to the library and get picture books to read aloud
  • Play magnetic darts
  • Take photos
  • Have a family movie night with one of the real old Disney movies
  • Roast hot dogs or marshmallows over a fire (even in the fireplace!)
  • Write thank you notes to brighten peoples’ days
  • Play string games
  • Play “ding-dong ditch” leaving a surprise on a neighbor’s porch
  • Tell jokes (get a joke book at the library)
  • Fold some origami creations
  • Invent recipes
  • Sing (learning parts is really fun)
  • Make a “back rub line” (all family members sit in a line and massages the back in fornt of him)
  • carve soap
  • take videos while you make your own silly “commercials”
  • Pop popcorn
  • . . . shall I go on?

    It doesn’t take money. It just takes willingness.

    Have fun!

    { 0 comments }

    Dry that Garden!

    I woke up this morning to the low hum of my food dryer, a regular happy summer sound as I transform my extra garden produce into food that we can use all winter long.  Drying is such an easy way to do it!

    Every morning we go out into the garden and pick the day’s harvest, and whatever we aren’t going to use that day goes right into the food dryer.  It only takes a few minutes to wash it, and lay it or slice it onto the trays. I keep my food dryer in the laundry room and it runs night and day during the summer. It takes very little energy, and makes very little noise or heat. Right now I have it loaded with kale and sliced yellow squash.

    I’ve found the easiest way to use nutritious garden kale all winter long is to dry it and crumble the leaves into flakes.  It is amazing how small of a jar a whole harvest basket full of kale can fit into, once it is dried!  I label these jars and tuck them into my spice cupboard.  It is so handy to sprinkle kale into anything I am cooking: soups, casseroles, even scrambled eggs. I use kale all year long!

    To dry kale, I cut the center fibrous stalk out of the leaf before loading the kale onto the drying trays, or if I am in a hurry, I put the whole leaf on the drying tray and just crumble the dried leaf away from the harder stalk and discard the stalk (actually all my “discard” goes to the chickens!)

    Kale is dry to the brittle stage overnight and my dryer is ready to load again!  You don’t have to be exacting about time in the dryer:  10 hours or 20 hours yields about the same results.  If you put the temperature up too high, you can get some over-dried brown spots, so keep it at medium heat.  No need to wash the trays, as any food remnants on the trays are very dry and preserved  . . . and besides, those bits are most welcome to join the next batch of dried food that goes into my spice jars!

    Yellow squash and zuchinni, which every gardener tends to have too much of, makes a wonderful dried cooking ingredient. I slice it and load it onto the trays and when it is very dry and brittle, I let it cool on the trays and then fill my blender with it and buzz it into a crumbled powder.  Into a glass jar it goes, labeled and in my spice cupboard.  Shaking this “squash powder” into soups thickens them well, and adds nutrition and flavor!  It’s great in baking too—add it to muffins (zuchinni muffins are good, right?) . . . and add it everywhere. I shake it into spaghetti sauce or sprinkle it ontop of my homemade pizza.

    Everything you cook can be nutrition packed with summer’s fresh flavors and high vitamin/mineral content. I’ve often thought that we don’t need to take a vitamin pill, with all the “shaking” out of these jars that I do when I cook. You don’t really taste the kale or the squash, but the whole dish tastes richer and looks flecked with lovely colors!

    What do I dry, powder and pack into jars?

    • beet greens
    • kale
    • chard
    • collards
    • eggplant
    • tomatoes
    • zucchini
    • yellow squash
    • green beans
    • parsley
    • herbs

    All the extra fresh herbs that I have in abundance: dill, basil, thyme, oregano, parsley, lemon balm, rosemary, mint are quick drying and fabulously fresh-tasting in winter meals. (Herbs can also be successfully frozen for extra delicious fresh taste! )

    And here’s a list of what I do not dry and preserve from my summer garden:

    • radishes
    • sugar snap peas (I freeze those)
    • winter squash (store in a cool place instead, as they last well)
    • potatoes (same as squash)
    • beets
    • carrots (you can buy these already dried quite inexpensively)
    • onions (these too!)
    • cucumbers
    • melons
    • soft fruits

    I’d rather freeze berries, peaches, plums, etc. as they turn great frozen. Hard fruits such as apples are great dried, but once again, it is so inexpensive to buy dried apples that unless you have huge abundance, it is probably not worth the labor.)  And you can make fruit leather with the food dryer too.

    If you don’t have a food dryer, you can dry some things such as herbs by hanging them.  See my directions here.
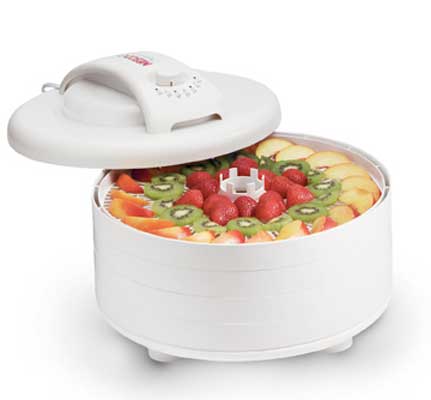
    My favorite food dryer!

    Or even better, buy yourself a food dehydrator!  It’s a great investment!  Let me recommend my favorite food dryer. If you’d like to buy one now, I’ll give you an additional $5 off my already on-sale price!  (Type “BLOG” in the comment box at checkout, so we can give you the discount as we process your order.)  If you have a big garden, is it really handy to get the extra trays.  I keep mine all loaded up.  You’ll use it all summer long!

    Do you need a food drying book so you know what you are doing?  No, not really. It is basic and easy stuff:  just slice the food so it is only about 1/4″ to 1/2″ thick—more or less—and dry it until it is brittle feeling.  That’s the sum total idea from the many drying books I’ve read.  If you leave moisture in the food, it may mold.  Food dried to “brittle” will last for years and years and years. It takes moisture for bacteria and mold to ruin food, so don’t leave any in.  And then make sure you store your food in an air-tight container.  Like a jam jar or peanut butter jar. I don’t buy jars, I just recycle grocery store food jars and spice jars.  Keeping them in the dark (in an amber jar, or inside a cupboard rather on the counter) make them retain their vitamins better.  I have green pepper strips and mushrooms I dried ten years ago that are still great.

    I usually add my dried foods in crumbled or powdered form to what I am cooking or baking and it reconstitutes itself, but if you have a mind to reconstitute dried food separately, simply place it in a dish and cover with hot tap water, about 5 x as much water as food, approximately.  Set it aside and in awhile (10 to 60 minutes, depending on the thickness of the food), it will look like regular food again, sorta.  It is amazing how compact dried food is!

    If you are in a real hurry to reconstitute your dried food, just add it to boiling water and simmer for a few minutes. I’ve made plum spread to use as a pancake topping out of dried plums in 5 minutes on the stovetop.

    Summer’s nutrition, all packed neatly in jars to cook with all winter long.  I love it!

    Okay, what are we waiting for?  Get that dryer loaded up!


    P.S. You can buy the “too-much-trouble-to-dry” foods already dried and canned for you, inexpensively here:

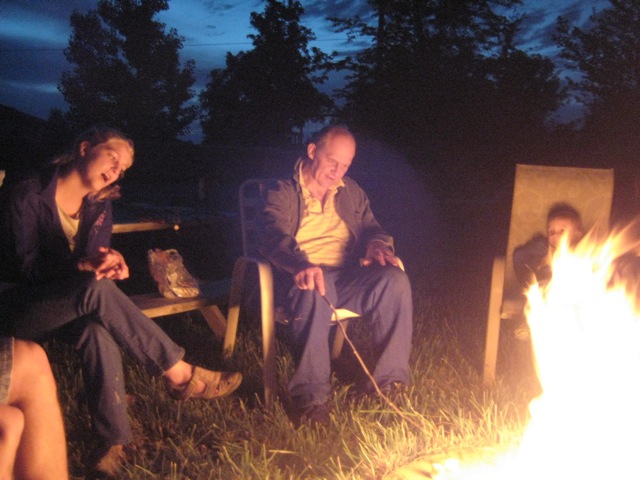
    Dried Carrots

    Dried Onions


    { 0 comments }

    Don’t Miss Out on the Fun!

    Today I was had a brief conversation with an acquaintance, and I asked her, “So, what are you doing fun this summer?”  She looked rather perplexed and said, “Nothing.  I can’t wait for school to start again.”  When she saw my surprise, she explained, “Well, I work.”  That small interchange left me pondering and resulted in an outpouring of joy and gratitude for the “fun” I get to enjoy everyday with my family!

    Ahh. . . life is so good. I want to cherish every bit of it!

    At my house, summer means swimming, biking, growing things and using them to cook yummy dishes, reading aloud, hiking, preserving summer’s harvest, sewing together, picking the flowers we grow to arrange for the table or to give to a neighbor, inventing new recipes . . . and more swimming! Summer means fun and family togetherness and things to look forward to!

    I am a “worker bee”.  I like to be productive. I want to see service, and work and accomplishment. It has taken a while for me to learn from my children how to relax and play.  I still want the work done, but Emily taught me that setting a limit on work (45 minutes in the garden, for example) with some fun planned at the end helps kids not get discouraged.  And 45 minutes of steady, happy cooperation day-by-day gets the garden tended much better in the long run.

    We get up and get our chores done quickly so we can bike ride or swim or sew or whatever we are excited about.  Is this an effort for a parent?  Yes, it is a bit of trouble to get the kids on bikes or to get everybody suited up for swimming.  Is it worth it?  Yes, oh yes! The power of wholesome recreational activities is amazing!  It builds friendship in the family. It enhances cooperation a hundred-fold.  Kids are so willing to cooperate and plow through the work when they know swimming is waiting! It creates a sense of goodwill and joy. It makes you a more real and a more “I-want-to-be-like-you” person to your children.

    We all have heard the adage that “the family who prays together, stays together”. And the family who prays and plays together builds unbeatable unity!

    Friends are important—but our best friends are found within the family circle.  A tone of playfulness, fun and laughter in the family makes a child want to belong. And belonging to something fun prevents the pull of the world from sucking our children away from the faith of their fathers, and into the vortex of the current culture of worldliness.

    Mom, Dad . . . don’t miss out on the fun! Be there: get in the water, get on the bike, and have fun with your children.  Childhood doesn’t last!

    { 0 comments }

    More Pudding, Sugar Free!

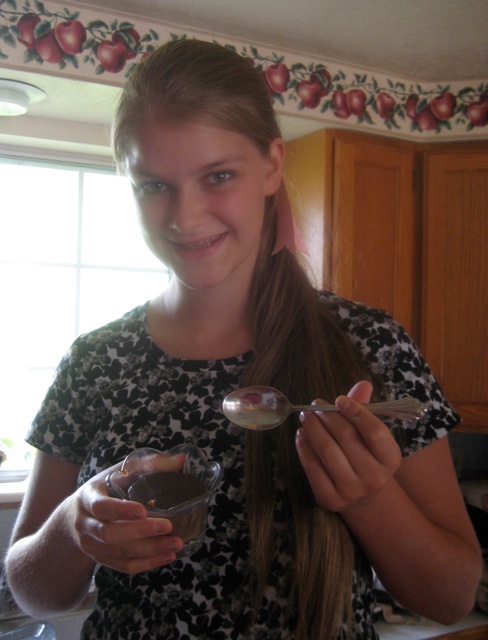
    Louisa and I are on a sugar-free puddin'-makin' binge!

    Louisa and I have been experimenting, which means pudding for Daddy every day.  Not a bad life!

    So, we tried making Butterscotch Pudding. When you heat sugar, it browns and caramelizes creating a butterscotch taste.  So, that is missing when you don’t use sugar. But we tried anyway to make butterscotch, and ended up making some awesome Pecan Praline Pudding! Light in color and taste, but definitely sweet and yummy!

    Here’s the recipe:

    Pecan Praline Pudding, Sugar Free

    • 1  1/2 tablespoons butter
    • 3 tablespoons xylitol
    • 1/2 teaspoon molasses
    • 2 cups milk (dry milk works great)
    • 2 tablespoons cornstarch
    • 1/8 teaspoon salt
    • 10-15 drops liquid stevia
    • 2 egg yolks, beaten
    • 1 teaspoon vanilla

    In a bowl, mix cornstarch, salt and dry milk powder if you are using it.  (You’ll need 6 tablespoons of non-instant dry milk powder or 8 tablespoons of instant dry milk powder to make the 2 cups of milk needed.  Mixing the dry non-instant milk powder with the cornstarch helps it not clump up).  Whisk to blend.  Add the milk (or scant 2 cups water, if using dry milk) and whisk until smooth.

    Melt the butter in a saucepan, add xylitol and cook over low heat until butter browns. Stir in molasses. Taste and add stevia to desired sweetness, 10-20 drops.

    Add milk mixture to the saucepan and whisk, cooking over medium heat until pudding boils.   Boil, stirring constantly, for one minute.  Gradually pour half of the pudding mixture into the beaten eggs, whisking continually.  Then pour the egg mixture back into the saucepan gradually, whisking continually.  Cook and boil for one more minute.

    Pour into pudding dishes and top generously with chopped pecans.  Serves 4.

    Delish!


    Today, Louisa and I expanded our chocolate pudding escapades to include a delicious chocolate mint pudding.  Oh boy!

    “Thin Mint” Pudding, Sugar Free

    Follow directions for Creamy Chocolate Pudding, adding 1 drop of peppermint oil just before pouring into dessert dishes.

    An alternative way to make a fresh mint taste is to put a few springs of mint from your garden into the blender with scant 2 cups of water.  Blend well and pour through strainer.  Use this water in the recipe in place of milk if using dry milk powder.  If you are using liquid milk, rather than dry milk, put the mint into the blender with 2 cups of milk, strain, and use this “minty” milk for the milk in the recipe.

    Enjoy!


    { 0 comments }

    Creamy Chocolate Pudding, Sugar Free!


    Louisa and I celebrate 2-years-sugar-free!

    In mid-July, my 15-year-old daughter Louisa and I celebrated our anniversary—we’ve been sugar-free for two whole years!  Yay! When someone served a chocolate cream pie today, she and I looked at each other and said, “we have to figure that out!” and we promptly headed for the kitchen. Here’s what we came up with!

    Creamy Chocolate Pudding (or Pie Filling), Sugar Free

  • 2 cups milk (can use dry milk powder)
  • 2 tablespoons cornstarch (or  arrowroot*)
  • 3 tablespoons xylitol
  • 1/8 teaspoon salt
  • 1/4 cup cocoa powder
  • 10-20 drops stevia
  • 1 teaspoon vanilla
  • 2 egg yolks, beaten
  • optional:  1 tablespoon butter (if using dry milk powder)
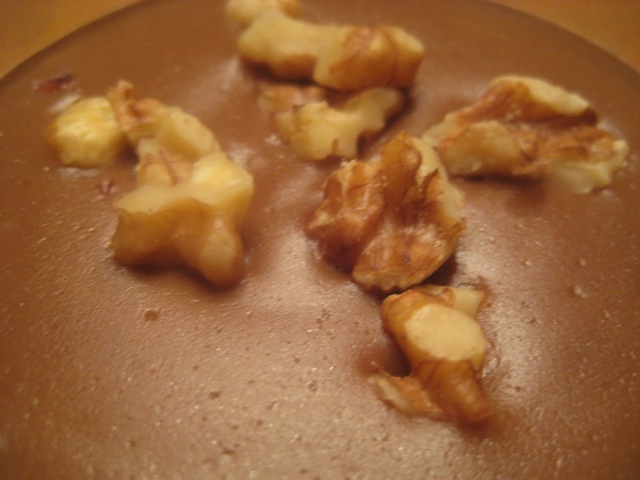
  • optional: chopped walnuts
  •  

    Beat egg yolks in a mixing bowl and set aside.

    Put all the dry ingredients into a saucepan, including dry milk powder if you are using it.  Whisk to mix well. Add milk (or water).  Stir over medium heat.  Taste mixture, and add 10 or more drops stevia if more sweetening is needed.

    Keep whisking and bring to a boil,  bubbling  for one minute.   Slowly pour pudding mixture into the egg yolks, whisking egg yolks as you pour.  After you have added 1/2 of the pudding to the egg yolks, then pour it back into the saucepan, whisking as you pour.  Boil for one more minute, stirring constantly.  If you are using non-fat dry milk powder, add butter if desired for a richer taste. Stir in vanilla.

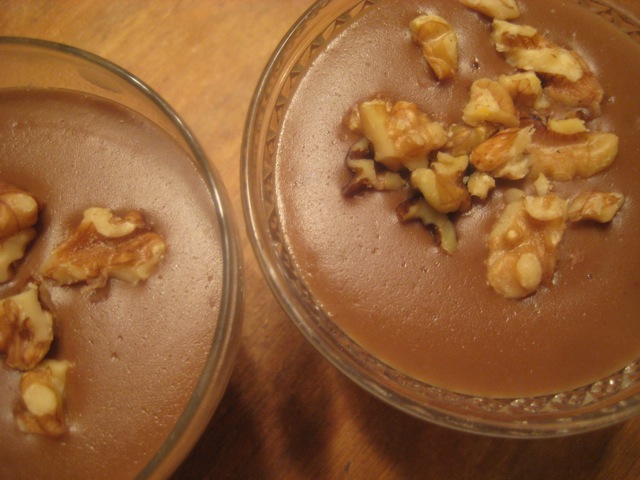
    Pour into dessert dishes. Top with chopped walnuts.  Serves 4.

    *To use arrowroot in place of cornstarch:
    Substitute 4 teaspoons of arrowroot for the 2 tablespoons of cornstarch in the recipe.  Do not boil, but remove from heat as soon as it thickens.

    This yummy pudding totally satisfies the sweet tooth!


    { 0 comments }

    We’ll Be Looking in the Mirror

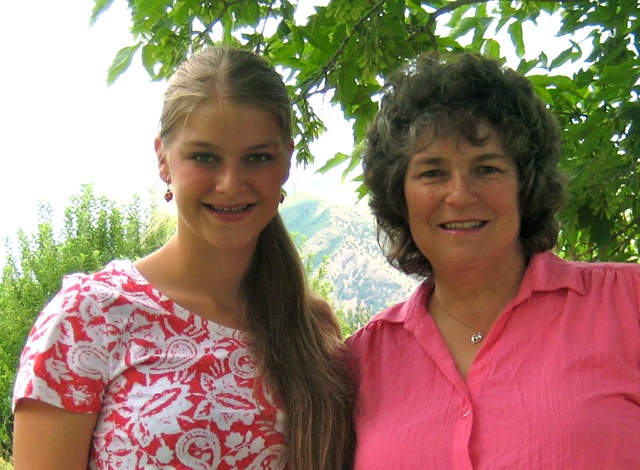
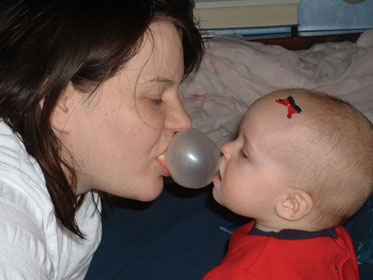
    Like mother, like daughter

    The problem with being a mom is that you are always and ever being watched and copied.  From what you read in the bathroom to how you act when a car cuts in front of you in traffic, your behavior is all being carefully recorded in the minds and hearts of your children.

    ARGH!  That is a truth that causes me pain!  You mean they are going to turn out like ME?! Help!

    This is the bad news. It is also the good news. God set us parents to be a model of Him to our children.  They look to us for direction. We say, in a sense, “Come follow me,” to our children, by the way we live.  Our facial expressions, our treatment of the elderly, our gratitude towards our husband for the paycheck we live on, our attitude towards keeping the speed limit, our food preferences, our goodness—it’s all up to us how our children will learn to act, will learn how to live.

    I’d like that sobering thought to govern my daily actions, but it sure is easy to forget . . . until I end up correcting my child for imitating my bad behavior!

    If we don’t want our kids to depend on sweets and chocolate as a way to cope with stress, guess what?  We’ve got to teach them a better way!  If we want them to keep their room clean, guess what?  We’ve got to clean up our messes and organize our home better ourself. If we don’t want them to criticize or talk badly about others, guess what?  We’ve got to model daily for them how to deal with other people’s shortcomings in a positive way.  If we want them to respect authority, guess what?

    Yep . . . .

    We are hopeful that our children will do better than we do, and be better than we are—and often they far excel us.  But in many ways, when we’ve finished raising our children, we’ll be looking in the mirror!

    I’m thinking on that today.


    { 0 comments }

    Finish Each Day and Be Done with It

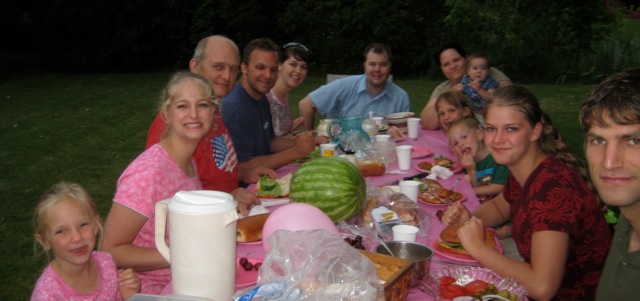
    Family picnic!

    Finish each day and be done with it.

    You have done what you could.

    Some blunders and absurdities no doubt crept in;

    Forget them as soon as you can.

    Tomorrow is a new day;

    Begin it well and serenely,

    And with too high a spirit to be encumbered with your old nonsense.

    —Ralph Waldo Emerson


    I read this almost every day, and it uplifts and encourages me!

    We are mortal. We do our best.  We stumble.  Just thinking of some of my slip-ups makes me shudder!  We say the wrong thing. We are sometimes unaware and therefore insensitive. But we must get up the next morning, and try our best . . . again. This thought of Ralph Waldo Emerson gives me peace and courage.

    Forgive yourself of today’s foolish mishaps. And try again, tomorrow, with a high spirit!  That is the most anyone can do.

    { 0 comments }

    What a Child Can Do

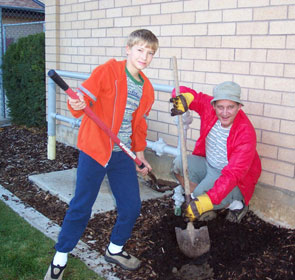
    My son Ammon learned to dig with his dad!

    Part of the magic of “Can-Do” is giving your children work that they can be successful at!  In case you are not sure what your child can do, this list might help. These are done “more or less” (not to perfection!) You have to train children first, and work with little ones until they fully understand.  Safety precautions always have to be taught.  Also, keep in mind their smaller size and muscle mass when assigning chores. A little guy simply can’t carry a big heavy water pitcher to the table without mishap, even though he is eager to do it.  Help them succeed by giving age-appropriate chores.

    9 months- 2 years

    • Put their pajamas away
    • Put dirty clothes in the hamper
    • Simple errands (get Mommy a diaper)
    • Put trash in the garbage can
    • Wipe up spills with a cloth
    • Plant seeds

    Age 2-3

    All that the former age could do, plus. . .

    • Sort laundry, toys, or utensils
    • Help make the bed
    • Pick up toys and books
    • Drag hamper to the laundry room
    • Feed pets
    • Wipe up spills
    • Dust
    • Set utensils on the table
    • Carry food to the table (bread, etc.)
    • Fold small items (washcloths, dish towels

    Age 4-5

    • Set table
    • Clear table
    • Cut soft foods with a butter knife
    • Help prepare some foods (slice bananas, stir)
    • Carry groceries
    • Water garden
    • Put away food in containers
    • Use an electric mixer
    • Clean out the car
    • Pull weeds

    Age 6-8

    • Sweep
    • Mop
    • Take out trash
    • Pull easy weeds
    • Rake
    • Clean room
    • Pour own drink
    • Run household appliances: dishwasher, electric mixer, washing machine, vacuum, toaster oven, blender, etc.
    • Put away laundry
    • Wash dishes
    • Rake

    Age 9-12

    • Care for small children
    • Change diapers
    • Plan meals
    • Grocery shop
    • Wash the car
    • Mow the lawn
    • Prepare meals on their own
    • Fold all household laundry, including blankets and big things
    • Sew
    • Do own laundry
    • Keep their own room clean
    • Use adult yard tools and do gardening work

    Teens

    With some patient training, teens can learn to do everything an adult can do (although not as proficiently at first). Even drive!  And help run your business! All they really lack is experience and wisdom.  And, practice makes perfect!  Keep in mind, also, that some teens may lack the muscle mass to do the heavy work of an adult male laborer.  I like to remember that in the frontier days of our country, the qualifications for marriage were simple:  when a teenage boy could build his own cabin, he was considered able enough to take on a wife and resulting family.

    Help them learn to work! That is the most useful lesson that comes from homeschooling!

    { 0 comments }

    Tomorrow

    I think as moms we often live in the zone of “tomorrow”. There is just so much to do today and we are getting tired.  Tomorrow is always there, promising more time and new energy.  Like Annie, it seems we bank our hopes that the “sun will come out tomorrow”.

    The bad news is that tomorrow just keeps hopping ahead one more day, and some very important things keep getting scheduled for “tomorrow”.

    Louisa had asked for cooking lessons for several YEARS!  (Gosh, it hurt me to write that!  Could I really have put her off for years?!)

    I had some grandiose ideas:

    • recipe cards in a cute flip-top recipe box
    • little 3-ring-binder that we add one recipe at a time as she learned to cook
    • vocabulary terms
    • discussion of cooking utensils and equipment
    • healthy sweet recipes that we invented together
    • a syllabus and a plan with weekly hour lessons where we focus on quick breads, then soups, salads, breakfast foods, etc.
    • fun, hands-on nutrition lessons
    • a cooking class with friends

    . . . ah, need I go on?

    Dreaming, dreaming!

    Better to do a little than nothing at all. If we wait to pull things together and do them up right, then very often NOTHING happens.  It is scheduled for that ever-fleeting “tomorrow”.

    So, one day when she was 10, I called Louisa in from play and said, “I want you to follow the recipe and make Cabbage Banana salad for dinner.  I’ll help you if you need me to.”  Nothing grandiose.  No organization or cute recipe cards needed.  Just spur-of-the-moment, practical stuff.

    She didn’t feel confident but the salad got done and a little bonus is that the other family members gave her some kudos for it.  And another bonus is that I got a direly needed reminder to myself that it doesn’t have to be done exactly right as long as it is generally edible.  She felt good about her effort!  Next day I had her make Broccoli Tree Salad.  And the following, it was Spinach Salad. Eventually I assigned her a weekly “dinner night” in which she planned the entire meal and had it ready on time.

    These were not the cooking lessons I dreamed of giving her. . . boo hoo!  But my spur-of-the-moment hands-on lesson was realistic, I could manage it right then.  Little by little, day by day, she learned and made the metamorphosis into the capable cook she is today!

    Don’t wait for that elusive tomorrow.  Let the sun come out . . . today!


    { 0 comments }

    How Did I Get to Be So Blessed?

    How did I get so blessed?

    To be an American

    To be free to worship God according to the dictates of my conscience

    To have enough to eat

    To have rights!

    To have the freedom to teach my children

    To speak freely

    To enjoy a peaceful and safe environment

    To own property

    To choose my own way

    God bless America, land that I love!


    Have a Happy Independence Day!

    Diane


    { 0 comments }